Applying window film is an excellent way to enhance your home’s aesthetics, improve energy efficiency, and add a layer of privacy without the high cost of professional installation. Whether you’re an interior designer looking to offer clients cost-effective solutions or a homeowner eager to spruce up your living space, mastering the art of DIY window film application can save you time and money.
In this comprehensive guide, we’ll walk you through the essential steps to achieve smooth, bubble-free results. With the right approach and a little patience, you can transform your windows into stunning features of your home.
Understanding Window Film and Its Benefits
Before diving into the application process, it’s vital to understand what window film is and why it’s a valuable addition to any home.
What is Window Film?
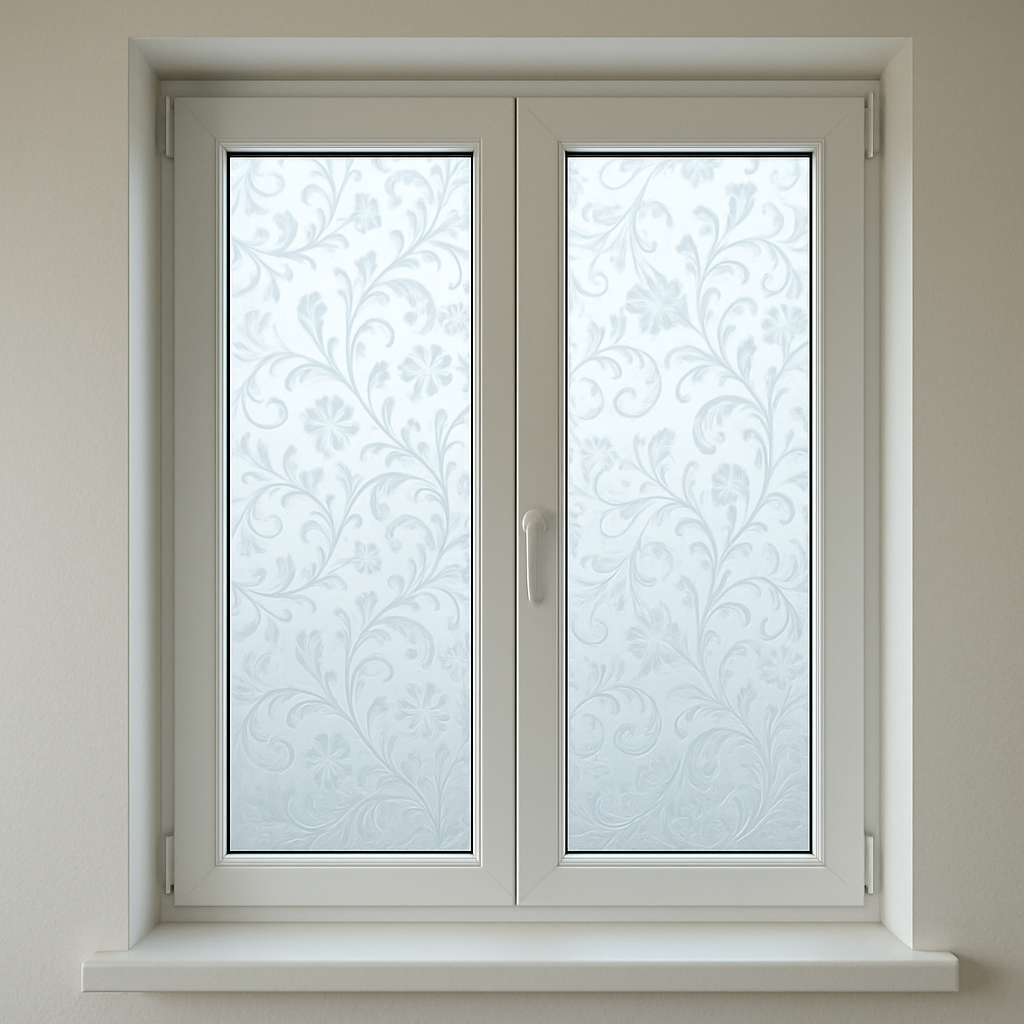
Window film is a thin laminate film that can be installed on the interior or exterior of glass surfaces in homes and buildings. It’s available in various styles, including frosted, tinted, and decorative patterns, allowing you to choose the perfect look for your space. If you’re new to this topic, you can start with this Introduction to window films to better understand how different types work.
Benefits of Window Film
- Energy Efficiency: Window film reduces heat gain in the summer and heat loss in the winter, helping lower energy bills.
- UV Protection: It blocks up to 99% of harmful UV rays, protecting your furnishings and floors from fading. According to the U.S. Environmental Protection Agency (EPA), improving window performance can significantly contribute to overall home energy efficiency.
- Privacy and Security: Tinted and frosted films provide privacy without sacrificing natural light.
- Aesthetic Appeal: Decorative films add a stylish touch to plain glass windows.
Preparing for Application
Preparation is key to achieving a flawless finish. Follow these steps to ensure your windows are ready for film application.
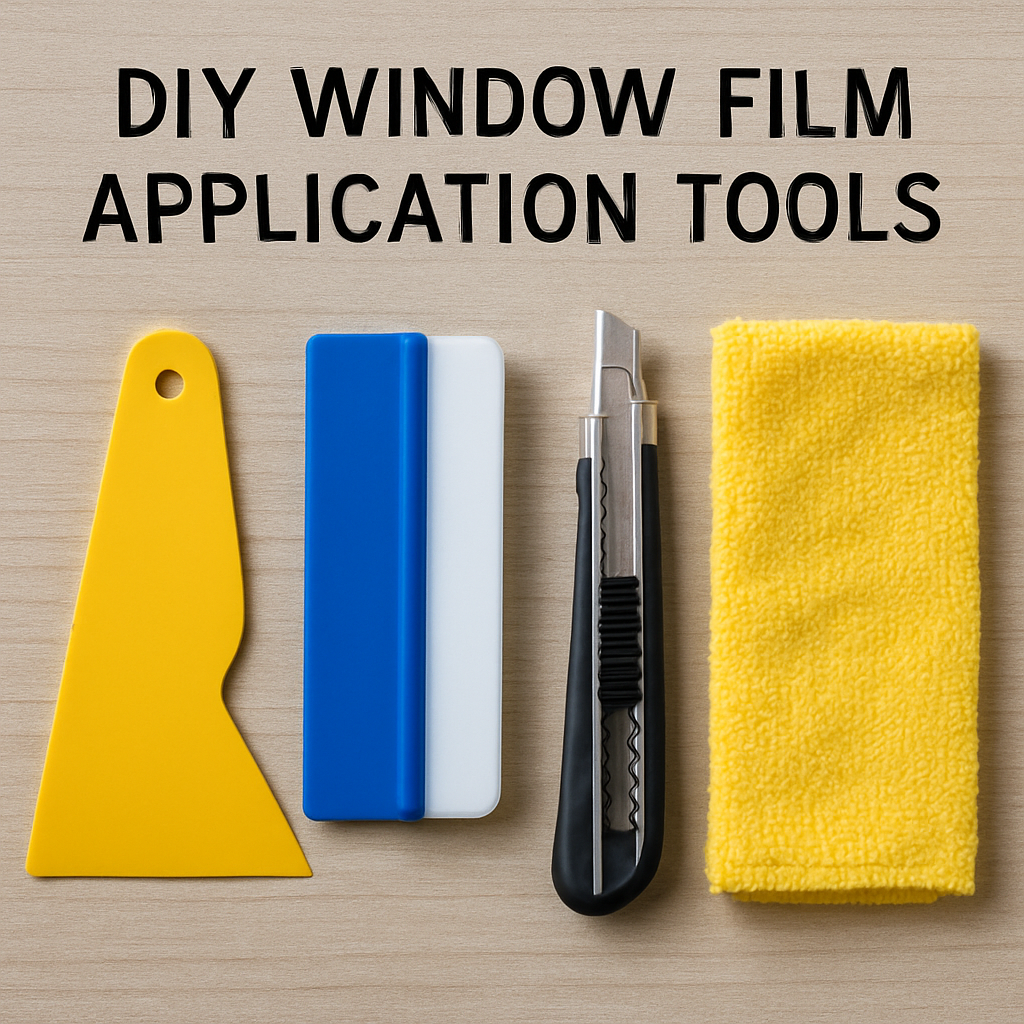
Gather Your Materials
Before starting, make sure you have all the necessary tools and materials:
- Window film of your choice
- Utility knife or scissors
- Measuring tape
- Squeegee
- Spray bottle filled with soapy water
- Lint-free cloth or paper towels
- Cutting mat (optional)
Clean the Windows Thoroughly
A spotless surface is crucial for bubble-free application. Use a glass cleaner or a mixture of water and vinegar to clean the windows. Ensure all dirt, grime, and old adhesive are completely removed. Finish by drying the windows with a lint-free cloth. For best practices on safe and effective glass cleaning, you can reference guidance from the Centers for Disease Control and Prevention (CDC) on maintaining healthy indoor environments.
Measure and Cut the Film
Measure the dimensions of your window panes and cut the film accordingly. Leave an extra inch on each side to ensure full coverage. Use a cutting mat and a utility knife for precise cuts.
Applying the Window Film
Now that your windows are clean and the film is cut to size, it’s time to apply the film. Follow these steps for a smooth application:
Wet the Window
Fill a spray bottle with soapy water and spray the window generously. The soapy water acts as a lubricant, allowing you to position the film easily and preventing it from sticking immediately.
Apply the Film
Peel the backing from the window film, exposing the adhesive side. Carefully place the film onto the wet window, starting at the top and working your way down. Ensure the film is aligned with the edges of the window pane.
Smooth Out the Film
Using a squeegee, start at the center of the film and work your way outwards to remove any air bubbles and excess water. Be firm but gentle to avoid tearing the film. Repeat this process until the film is completely smooth.
Trim the Excess Film
Once the film is in place, use a utility knife to trim any excess film along the edges of the window pane. Be precise to achieve a neat finish.

by Mak (https://unsplash.com/@mak_jp)
Troubleshooting Common Issues
Even with careful application, you may encounter some common issues. Here’s how to address them:
Air Bubbles
If you notice air bubbles after application, use the squeegee to push them towards the edges of the film. For persistent bubbles, gently lift the film and reapply.
Film Peeling
If the edges of the film begin to peel, ensure the window is clean and dry. Re-spray with soapy water and press the film firmly back into place.
Maintaining Your Window Film
To prolong the life of your window film, follow these maintenance tips:
- Clean Gently: Use a soft cloth and mild soapy water to clean the film. Avoid abrasive cleaners or scrubbing pads.
- Avoid Sharp Objects: Be cautious with objects near the windows to prevent scratches or tears in the film.
- Reapply if Necessary: Over time, you may need to reapply film if it becomes damaged or loses its adhesive quality.
Conclusion
Applying window film yourself is a rewarding project that can enhance your home’s appearance and functionality. By following these tips, you’ll achieve professional-looking results without the high cost. Whether you’re seeking to improve energy efficiency, add privacy, or simply update the look of your windows, window film offers a versatile and affordable solution.
With a bit of practice and attention to detail, you’ll be able to tackle any window film project with confidence. So go ahead, transform your windows, and enjoy the benefits of this fantastic home improvement solution.