Solar film, often known as window film, is an innovative solution that has gained popularity among homeowners looking to enhance their living spaces. Despite its numerous benefits, several myths about solar film persist, which can deter people from considering it as a viable home improvement option. In this article, we will debunk these myths and highlight the true advantages and applications of solar film for home windows.
Solar film is a thin laminate film that can be installed on the interior or exterior of glass surfaces in residential and commercial buildings. It is designed to reject heat, reduce glare, and block harmful UV rays, thereby improving comfort and energy efficiency.
Myth 1: Solar Film is Just for Commercial Buildings
One of the most common misconceptions is that solar film is only suitable for commercial buildings. In reality, solar film is a versatile solution that can be used in homes to enhance comfort and aesthetics. It is an effective way to reduce energy costs while maintaining the architectural integrity of a residential property.
Myth 2: Solar Film Makes Rooms Too Dark
Many homeowners worry that installing solar film will make their rooms feel dark and gloomy. However, modern solar films are designed to maintain natural light while significantly reducing glare and heat. With various tint levels available, you can choose a film that meets your lighting preferences and enhances the ambiance of your space.
Benefits of Solar Film
Solar film offers several advantages that make it an attractive option for homeowners. Here are some key benefits:
Energy Efficiency
Solar film can help reduce energy consumption by blocking up to 99% of harmful UV rays and reflecting a significant amount of solar heat. This means your home will stay cooler in the summer and warmer in the winter, reducing the need for air conditioning and heating.
Protection Against UV Rays
Prolonged exposure to UV rays can cause furniture, flooring, and artwork to fade over time. Solar film acts as a protective barrier, preserving the color and quality of your interior furnishings.
Glare Reduction
Solar film reduces glare from the sun, making it easier to watch television, work on a computer, or read a book without straining your eyes. This is particularly beneficial in rooms with large windows or direct sunlight.
Enhanced Privacy
Certain types of solar films can increase privacy without compromising on natural light. Frosted or reflective films can obscure the view from outside, providing a sense of security and seclusion.
Aesthetic Appeal
Solar film comes in a variety of styles and finishes, allowing you to customize the look of your windows. Whether you prefer a neutral, reflective, or decorative finish, there is a solar film option to suit your aesthetic preferences.
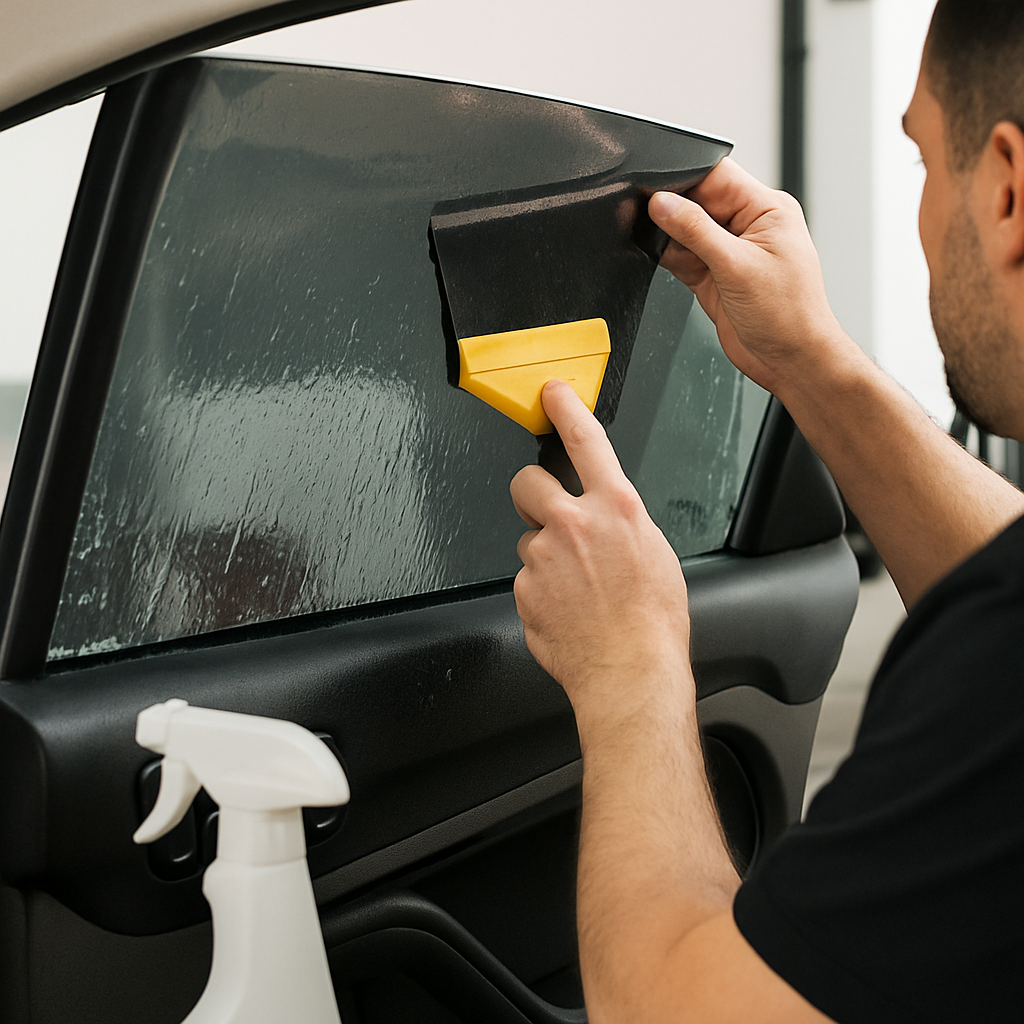
Installation Process
by william f. santos (https://unsplash.com/@youwwwill)
Myth 3: Solar Film is Difficult to Install and Maintain
Some people believe that solar film installation is a complicated process that requires frequent maintenance. In truth, professional installation is quick and hassle-free, and once installed, solar film requires minimal upkeep. Regular cleaning with mild soap and water is all that’s needed to keep the film looking its best.
Professional Installation vs. DIY
While DIY solar film kits are available, professional installation ensures the best results. Certified installers have the expertise to apply the film without bubbles or creases, ensuring a smooth and long-lasting finish. Professional installation also typically includes a warranty, providing peace of mind for homeowners.
Common Concerns Addressed
Myth 4: Solar Film is Expensive
Another myth is that solar film is prohibitively expensive. However, when you consider the energy savings and protection it provides, solar film is a cost-effective investment. It can lower your energy bills and extend the life of your interior furnishings, ultimately saving you money in the long run.
Myth 5: Solar Film Damages Windows
There is a misconception that solar film can damage windows or void their warranty. High-quality solar films are designed to be safe for all types of glass and will not cause damage when installed correctly. In fact, many window manufacturers recommend solar film as a way to enhance the performance of their products.
Conclusion
Solar film is a valuable home improvement solution that offers numerous benefits, from increased energy efficiency to enhanced privacy and protection against UV rays. By debunking common myths, we hope to encourage more homeowners to consider solar film as a practical and stylish option for their windows.
Whether you are an interior designer seeking to provide clients with eco-friendly solutions or a homeowner looking to improve your living space, solar film is a versatile and effective choice. Embrace the benefits of solar film and transform your home into a more comfortable and energy-efficient environment.
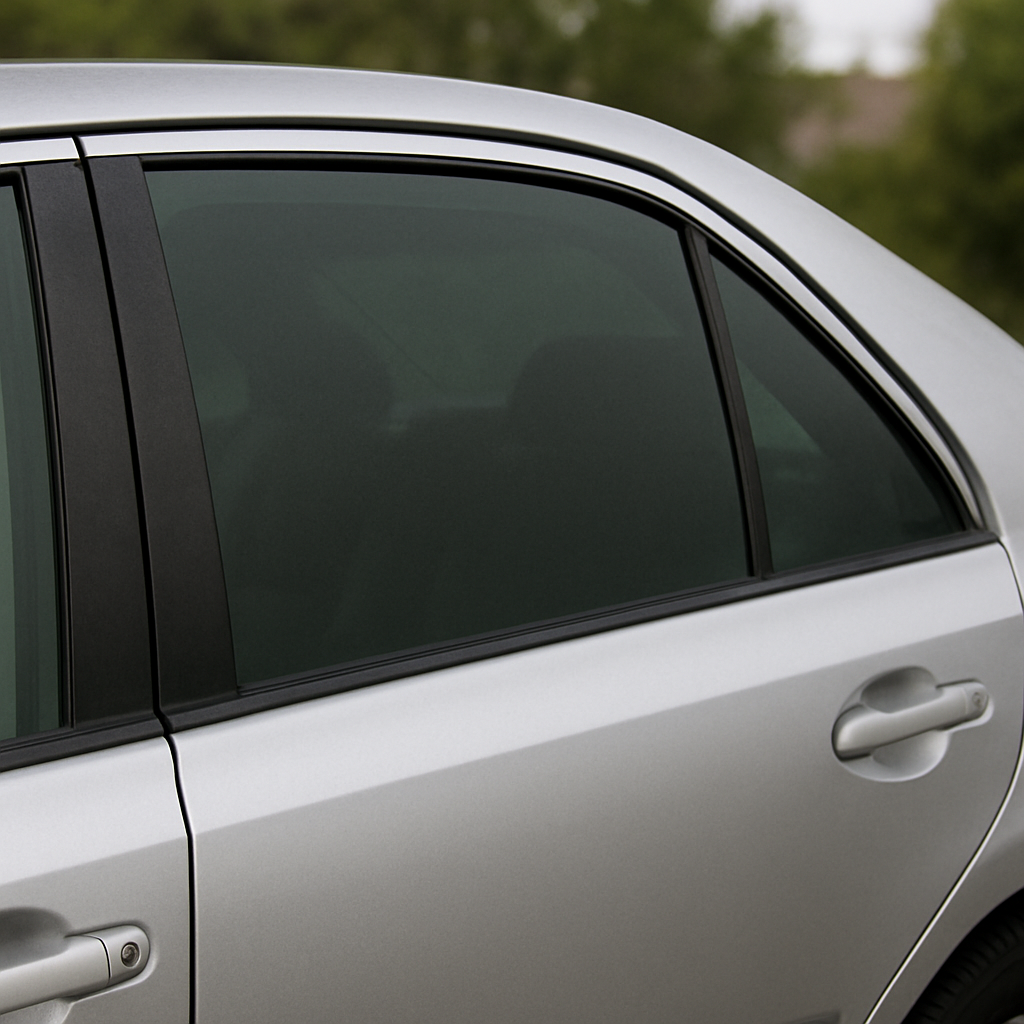
Window tint is measured by its Visible Light Transmission (VLT) percentage, which indicates how much light passes through the tint. A 70 Vlt tint means that 70% of visible light is allowed to pass through the window. This level of tint provides a moderate amount of shade, offering a balance between visibility and protection. It is an excellent choice for those who want to maintain a clear view while still benefiting from some level of shading.
Choosing a 70 Vlt window tint can be particularly beneficial if you frequently drive in varying light conditions. The moderate tint level ensures that your vision remains unobstructed during both day and night driving. Moreover, it offers an enhanced driving experience by reducing the glare from sunlight and headlights, which can be particularly distracting and fatiguing during long journeys.
Benefits of 70 Vlt Window Tint
Improved Comfort: By reducing glare and heat, 70 Vlt tint improves the overall comfort of your car’s interior. This can be particularly beneficial during hot summer days when the sun’s rays can make your car unbearably warm. The reduction in heat can also prolong the life of your car’s air conditioning system by lessening its workload, thereby providing additional savings on fuel.
UV Protection: Prolonged exposure to UV rays can damage your skin and car interiors. A 70 Vlt tint blocks a significant amount of UV radiation, helping to protect both your skin and the interior of your car from fading and cracking. This protection is crucial not only for your health but also in maintaining the resale value of your vehicle by preserving its interior condition.
Enhanced Privacy: While not as dark as some tints, a 70 Vlt tint still provides a degree of privacy by making it harder for outsiders to see into your vehicle. This can be particularly useful in deterring potential thefts by keeping the contents of your car less visible. It also offers a sense of personal space, allowing you to feel more secure when parked in public areas.
Aesthetic Appeal: For those who prefer a more subtle look, 70 Vlt tint offers a sleek and sophisticated appearance without drastically altering the look of your car. The tint adds a touch of elegance and can complement any vehicle color, enhancing the overall visual appeal. It is a versatile option that can seamlessly blend with both modern and classic car designs.
Energy Efficiency: By blocking heat from entering the vehicle, 70 Vlt tint can reduce the need for air conditioning, thereby improving fuel efficiency. This not only saves money but also contributes to a reduction in the vehicle’s carbon footprint. Over time, the savings on fuel can offset the initial cost of the tint, making it a financially sound investment.
Comparing 70 Vlt with Other Tints
When choosing window tint, it’s important to consider how 70 Vlt compares to other levels of tint. Each level of tint offers different benefits and drawbacks, and understanding these can help you choose the best option for your specific needs and preferences.
Lighter Tints
Tints with higher VLT percentages, such as 80% or 90%, allow more light to pass through. These tints offer less heat and UV protection but provide excellent visibility. They are ideal for those who want minimal tinting and are primarily concerned with maintaining clear visibility. These tints are particularly suited for regions where sunlight is less intense or for drivers who prefer a more open feel in their vehicle.
Lighter tints can also be an excellent choice for vehicles that have larger windows or for those who want to maintain the original look of the car. They provide a subtle shade that can slightly reduce glare without impacting the overall lightness of the car’s interior. Additionally, they are less likely to attract the attention of law enforcement in areas with strict tinting laws.
Darker Tints
Lower VLT percentages, such as 20% or 30%, block more light and offer greater privacy and heat reduction. However, they can also reduce visibility, especially at night. These tints are often chosen for their strong privacy features and bold look, appealing to those who prioritize privacy and a distinctive appearance.
Darker tints are particularly effective in regions with intense sunlight, providing maximum protection against heat and UV rays. However, they require careful consideration of local laws and personal safety, as reduced visibility can be a concern during nighttime driving or in adverse weather conditions. It’s crucial to weigh the benefits of privacy and heat reduction against the potential drawbacks in visibility.
Legal Considerations
It’s important to note that window tint laws vary by state and country. Before installing any tint, ensure that your choice complies with local regulations. In many regions, 70 Vlt is a legal and safe choice for front windows, providing a good balance of benefits without risking legal issues.
Understanding local tint laws can prevent potential fines and the hassle of having to remove non-compliant tints. Researching these regulations beforehand can save time and money, ensuring that the chosen tint provides the desired benefits while adhering to legal standards. Consulting with a professional installer can also help clarify any questions regarding compliance.
How to Choose the Right Tint for Your Needs
When selecting a window tint, consider the following factors to ensure you make the best choice for your vehicle and lifestyle:
Purpose
Determine what you want most from your tint. Is it privacy, heat reduction, UV protection, or aesthetics? Knowing your primary goal will help you choose the right VLT percentage. For instance, if UV protection is your top priority, focus on tints that offer the highest level of UV blocking technology.
Understanding your primary objectives can also help narrow down options, making the selection process less overwhelming. If your needs change over time, consulting with a professional can help you adjust your tint to suit new preferences or requirements.
Climate
If you live in a hot climate, a tint with good heat rejection, such as 70 Vlt, can keep your car cooler and reduce reliance on air conditioning. In cooler climates, you might prioritize UV protection or aesthetics over heat rejection. Consider how the tint will perform in varying weather conditions throughout the year.
Assessing climate factors can also guide decisions on additional features, such as infrared rejection or glare reduction. These features can enhance comfort and safety, ensuring that the tint performs optimally regardless of seasonal changes.
Vehicle Type
Consider the type and color of your vehicle. A 70 Vlt tint complements most colors and types, offering a balanced look. However, the final decision should align with your personal style preferences. The size and shape of your vehicle’s windows can also influence the effectiveness and appearance of the tint.
For instance, larger vehicles may benefit more from tints with higher heat rejection capabilities, while sports cars might prioritize a sleek aesthetic. Matching the tint to your vehicle’s design can enhance its overall appearance and provide a cohesive look.
Budget
Window tinting can range in price depending on the quality and type of film used. While it may be tempting to opt for cheaper options, investing in a high-quality tint will provide better longevity and performance. Consider the long-term benefits and potential savings on energy costs when evaluating your budget.
Balancing cost with quality ensures that the tint not only meets immediate needs but also provides lasting value. High-quality tints often come with warranties that offer peace of mind and protection against defects or fading.
Professional Installation
To ensure the best results, it’s recommended to have your window tint installed by a professional. They can provide expert advice on the best tint for your needs and ensure a flawless application. Professional installation reduces the risk of bubbles, peeling, or improper adhesion.
Choosing a reputable installer can also offer insights into the latest tinting technologies and trends, allowing you to make an informed decision. Additionally, professionals can assist with compliance checks and provide maintenance tips to extend the life of your tint.
The Installation Process
Once you’ve chosen the right tint, the installation process is straightforward but requires precision. Here’s what to expect:
Preparation: The windows are cleaned thoroughly to remove any dirt or debris that could affect the tint’s adhesion. This step is crucial to ensure a smooth and even application, preventing any imperfections in the final result.
Cutting: The tint film is precisely cut to fit each window. This step is crucial for ensuring a seamless look. Professional installers use specialized tools and techniques to achieve precise cuts that align perfectly with the window’s edges.
Application: The film is carefully applied to the interior of the windows, ensuring no air bubbles or creases are present. This step requires skill and attention to detail to achieve a perfect finish that enhances the vehicle’s appearance.
Curing: The tint needs time to cure and adhere properly. This process can take a few days, during which you should avoid rolling down the windows. The curing period ensures that the tint bonds fully with the glass, maximizing its durability and effectiveness.
Maintaining Your Window Tint
Proper maintenance will extend the life of your window tint. Here are some tips:
Avoid Harsh Cleaners: Use a mild soap and water solution or a cleaner specifically designed for window tint. Harsh chemicals can degrade the tint film and cause discoloration or peeling over time.
Soft Cloth: Use a soft microfiber cloth to prevent scratches when cleaning the tinted windows. Regular cleaning with a gentle touch helps maintain the clarity and appearance of the tint.
Avoid Rolling Down Windows: For a few days after installation, keep windows rolled up to ensure the tint cures properly. Adhering to this precaution helps prevent any disruptions in the curing process and ensures the tint adheres securely.
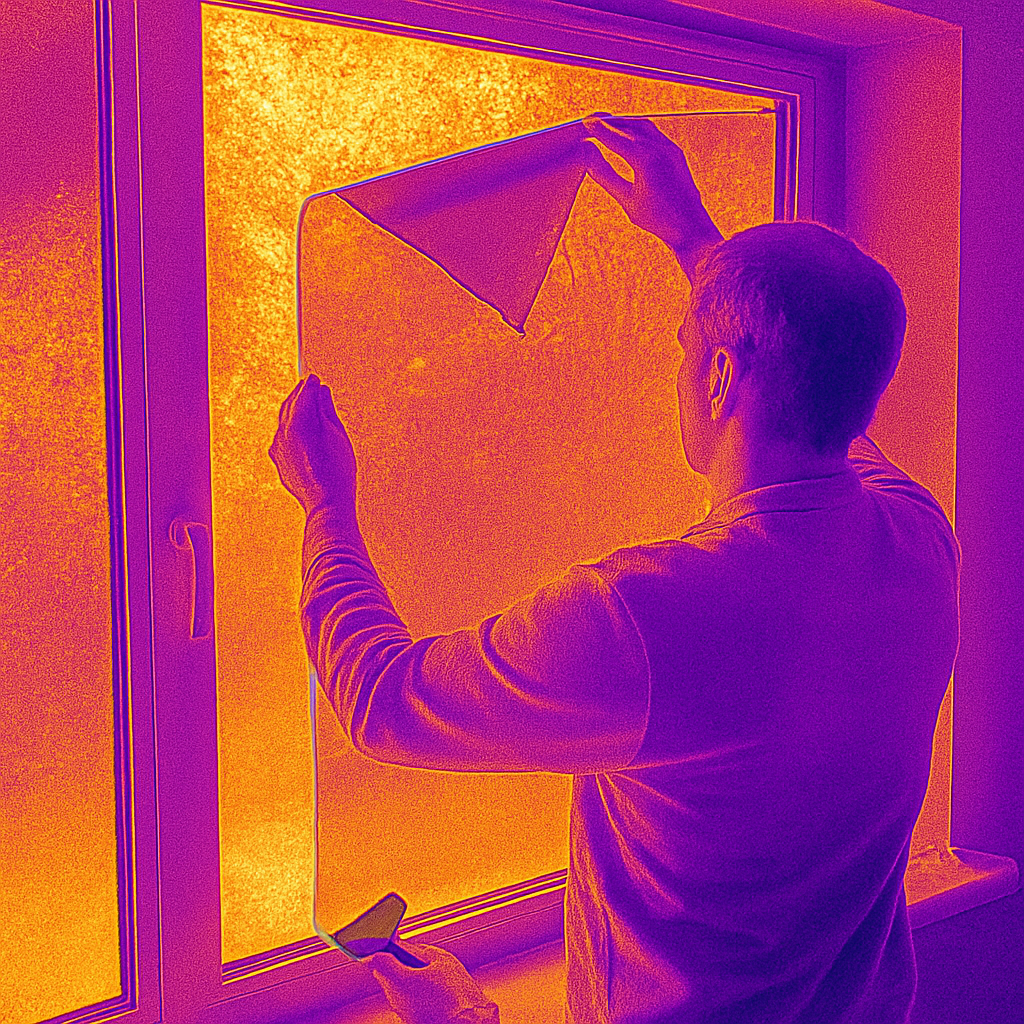
Conclusion
by Farida Gurbanova (https://unsplash.com/@fagurbanova)
Choosing the right 70 Vlt window tint involves considering your needs, climate, and personal style. This tint offers a great balance of visibility, comfort, and protection, making it a popular choice among car owners. Remember to check local regulations and consider professional installation to achieve the best results. With the right choice, you can enhance both the look and functionality of your vehicle, making every drive more enjoyable and stylish.
Ultimately, a well-chosen and properly installed window tint can transform your driving experience, offering benefits that extend beyond aesthetics. By prioritizing quality and compliance, you can enjoy the advantages of a comfortable and protected vehicle interior for years to come.
Winter is a season of cozy evenings by the fireplace, warm mugs of cocoa, and unfortunately, higher energy bills. As the temperature drops, homeowners often find themselves struggling to keep their homes warm without the hefty price tag that comes with increased heating. Luckily, there’s an often-overlooked solution: window film.
In this article, we’ll explore the numerous benefits of using window film in the winter. From energy savings to enhanced comfort, window film is an affordable and effective way to improve your home’s efficiency and comfort during the colder months.
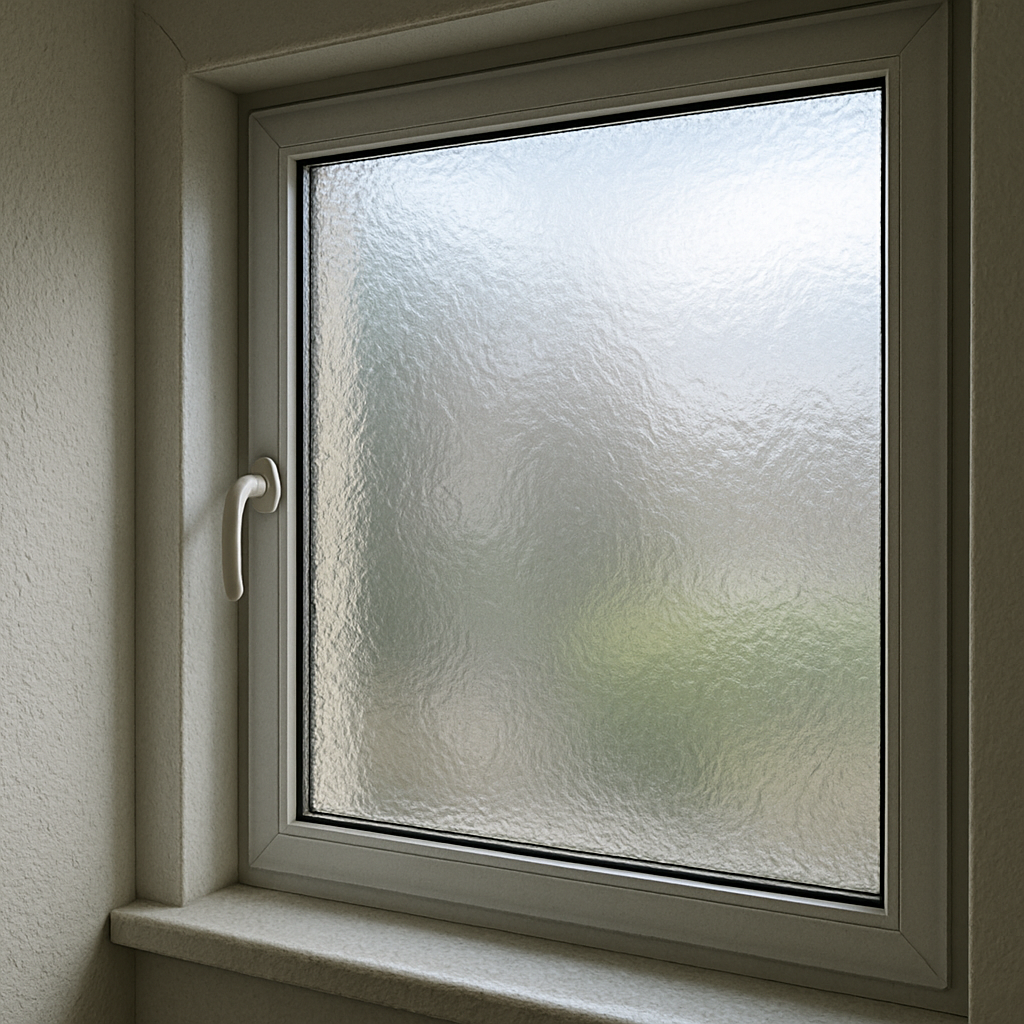
Window film is a thin layer of material applied to the interior surface of windows. It can be made from various materials, including polyester or vinyl, and is designed to improve your window’s performance. While window films are often associated with reducing glare and blocking UV rays in the summer, they offer significant advantages during the winter months as well. If you’re new to the concept, this Introduction to window films provides a helpful overview of how they work and why they’re effective.
Types of Window Film
There are several types of window films, each designed to address specific needs:
Thermal Window Film: This is designed to enhance insulation, reducing heat loss during winter and keeping your home warmer.
Security Film: Adds an extra layer of protection by holding shattered glass in place in case of breakage.
Decorative Film: Offers aesthetic enhancements, allowing for privacy and style without compromising natural light.
Window Film Benefits in Winter
Energy Efficiency
One of the most compelling reasons to use window film during winter is its ability to improve energy efficiency. Thermal window films act as an insulative barrier, reducing heat loss through windows. According to the U.S. Department of Energy, improving window efficiency can significantly reduce heating and cooling costs. This means your heating system doesn’t have to work as hard, leading to lower energy bills and a reduced carbon footprint.
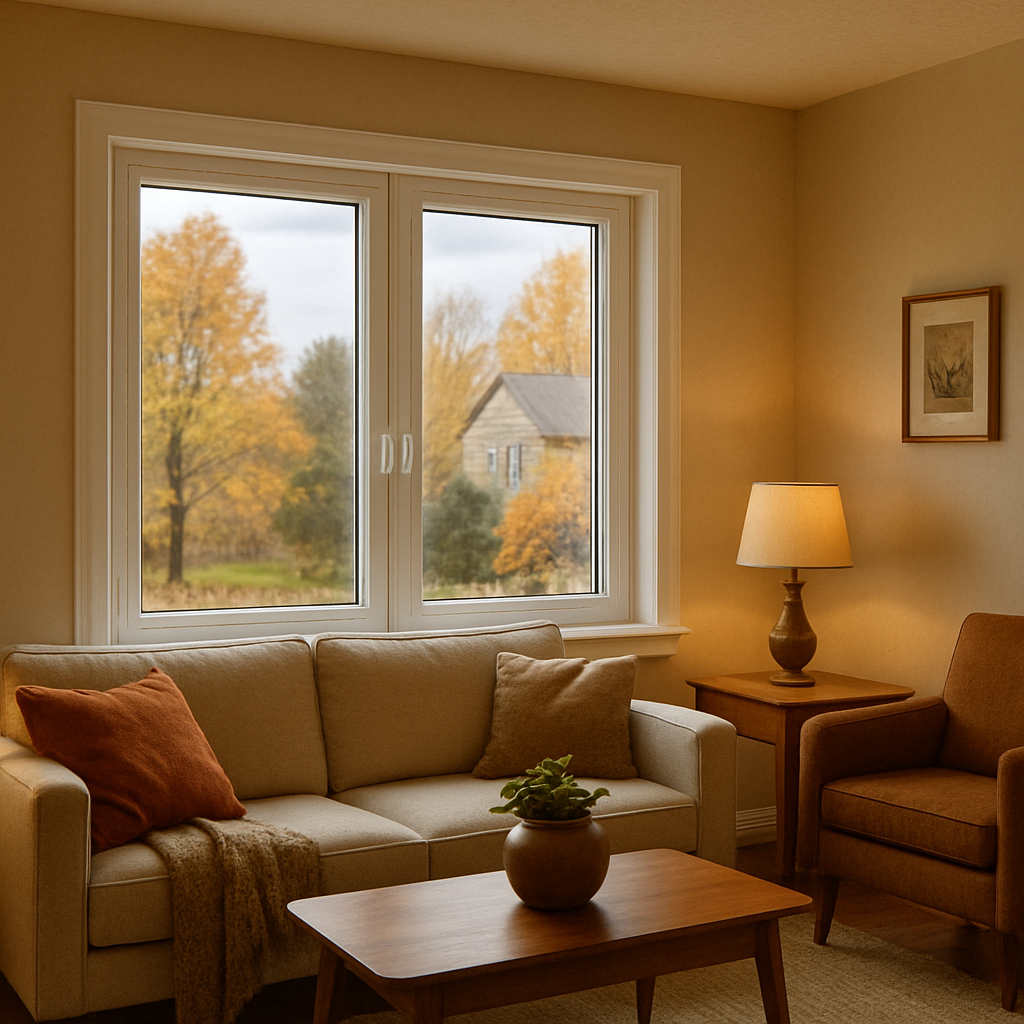
Enhanced Comfort
With window film, you can enjoy a more consistent indoor temperature. By minimizing drafts and cold spots near windows, your home feels cozier and more comfortable, regardless of the temperature outside. This is particularly beneficial for homeowners with older windows that may not be as efficient as modern designs.
UV Protection
Even in winter, UV rays can penetrate windows and cause furniture, flooring, and artwork to fade. Window film blocks up to 99% of harmful UV rays, protecting your interior furnishings and preserving their appearance and longevity. The U.S. Environmental Protection Agency (EPA) highlights the importance of limiting UV exposure to protect both health and interior materials.
Glare Reduction
Winter sun can be surprisingly bright and create uncomfortable glare on screens and surfaces. Window film reduces glare, allowing you to enjoy natural light without the discomfort or the need to constantly adjust blinds or curtains.
Cost-Effective Home Improvement
Affordable Installation
Window film is a cost-effective solution compared to replacing entire windows. The installation process is quick and non-intrusive, making it an ideal choice for homeowners looking to improve their home’s efficiency without major renovations.
Long-Term Savings
While the initial investment in window film is relatively low, the long-term savings can be substantial. By reducing energy consumption, homeowners can see a return on investment through lower utility bills, making window film a smart financial choice for the long run.
Opting for window film is not only beneficial for your wallet but also for the environment. By improving your home’s energy efficiency, you reduce the demand for heating, which in turn decreases greenhouse gas emissions. This makes window film an eco-friendly choice for environmentally conscious homeowners.
Aesthetic and Design Flexibility
Style Options
Window films come in various styles and designs, offering homeowners the flexibility to choose options that complement their interior decor. From frosted films that provide privacy to decorative patterns that add a touch of elegance, there’s a window film for every aesthetic preference.
Custom Solutions
For interior designers, window film offers a versatile tool to enhance both the functionality and appearance of a space. Films can be customized to meet specific design needs, ensuring that the solution is tailored to the client’s vision and lifestyle.
Installation Process
Professional vs. DIY
While DIY kits are available, professional installation is recommended to ensure the best results. Professionals have the expertise to apply the film without bubbles or wrinkles, maximizing its performance and lifespan.
Maintenance and Care
Once installed, window film requires minimal maintenance. Regular cleaning with a soft cloth and mild detergent is usually sufficient to keep the film looking its best and performing optimally.
Conclusion
Incorporating window film into your home during the winter months offers numerous benefits, from energy savings and enhanced comfort to UV protection and aesthetic appeal. It’s a cost-effective, eco-friendly solution that can transform your living space into a more efficient and enjoyable environment.
For homeowners seeking innovative ways to improve their home’s performance and reduce energy costs, window film is a valuable investment that pays off in both the short and long term. Consider adding window film to your winter home improvement checklist and enjoy the warmth, comfort, and savings it brings.
In today’s world, where energy efficiency and sustainability are paramount, homeowners and interior designers are constantly seeking innovative solutions to improve the energy performance of homes without compromising on aesthetics. One such solution that has been gaining attention is thermal window film. But what exactly is the ROI of thermal window film, and why should you consider it for your home or design projects?
Thermal window film is a thin layer of material applied to windows to enhance their insulating capabilities. It acts as a barrier, reducing the amount of heat transferred through the glass. This means in the summer, it helps keep the heat out, and in the winter, it helps keep the warmth in. The result? More energy-efficient windows that contribute to lower heating and cooling costs.
How Does It Work?
Thermal window film works by reflecting and absorbing solar energy. It is designed to allow visible light to pass through while blocking a significant amount of the sun’s heat and harmful UV rays. This not only helps in maintaining comfortable indoor temperatures but also protects furnishings from fading.
Types of Thermal Window Films
There are various types of thermal window films available, each with its own set of benefits. Some are tinted to provide additional privacy, while others are clear, maintaining the natural look of the glass. There are also decorative films that can add a touch of style to your windows. The choice of film depends on your specific needs and aesthetic preferences.
The Financial Benefits of Thermal Window Film
One of the most compelling reasons to invest in thermal window film is the return on investment (ROI) it offers. Here’s how this investment can pay off:
Lower Energy Bills
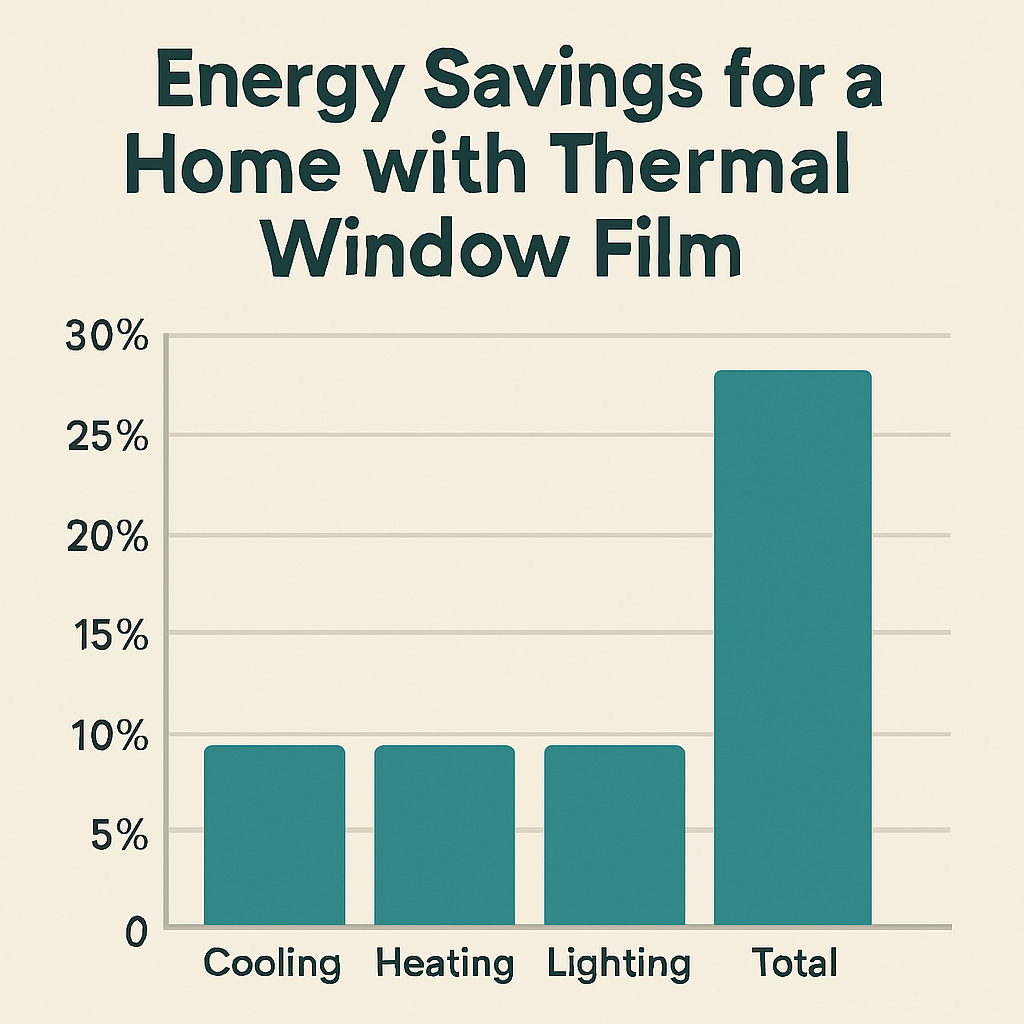
By improving the insulation of your windows, thermal window film reduces the need for excessive heating in the winter and air conditioning in the summer. This can lead to significant savings on your energy bills. Some studies suggest that homeowners can save up to 30% on their energy costs after installing thermal window film.
Increased Property Value
Energy-efficient upgrades are attractive to potential buyers. Installing thermal window film can increase the marketability of your property, making it a worthwhile investment if you ever decide to sell your home.
Extended Lifespan of Interiors
The UV protection offered by thermal window film helps prevent fading and damage to furniture, flooring, and artwork. This means your interior investments last longer, reducing the need for costly replacements or repairs.
Environmental Impact
In addition to financial benefits, thermal window film contributes positively to the environment. By reducing energy consumption, you are lowering your carbon footprint, which is a crucial step towards sustainable living.
Supporting Eco-Friendly Initiatives
Many local governments and utility companies offer incentives for homeowners who make energy-efficient upgrades. Installing thermal window film may qualify you for rebates or tax credits, further enhancing the financial benefits.
Choosing the Right Thermal Window Film
by Sheeyam (https://unsplash.com/@sheeyams)
Selecting the right thermal window film involves considering several factors:
Your Climate
The effectiveness of thermal window film can vary based on the climate you live in. In warmer climates, films that block a higher percentage of solar energy are beneficial, while in colder regions, films that focus on retaining heat might be more suitable.
Aesthetic Preferences
As mentioned earlier, thermal window films come in various styles and finishes. Consider whether you prefer a clear film that doesn’t alter the appearance of your windows or a tinted or decorative option that adds a design element to your space.
Professional Installation
While some homeowners may choose to install window film themselves, professional installation ensures the best results. Professionals have the expertise to apply the film without bubbles or creases, ensuring maximum performance and longevity.
Case Studies: Real-World Applications
Consider these examples of how thermal window film has been used effectively:
Residential Applications
In a suburban home in Texas, the installation of thermal window film resulted in a 20% reduction in energy bills within the first year. The homeowners also noticed that their home was more comfortable, with fewer hot and cold spots.
Commercial Applications
A small office building in California applied thermal window film to its south-facing windows. The result was a noticeable decrease in cooling costs and improved comfort for employees, leading to increased productivity and job satisfaction.
Conclusion: Is Thermal Window Film Right for You?
Thermal window film is a cost-effective, energy-efficient solution that offers multiple benefits. Whether you are a homeowner looking to reduce energy bills or an interior designer seeking eco-friendly solutions for clients, thermal window film could be the answer you’ve been searching for.
Incorporating thermal window film into your home improvement projects not only enhances energy efficiency but also adds value to properties and extends the life of interior furnishings. With the added potential for rebates and increased property value, the ROI of thermal window film is clear.
If you’re considering thermal window film, consult with a professional installer to discuss your specific needs and find the perfect solution for your windows. With the right film, you can enjoy a more comfortable, energy-efficient, and stylish living space.
Before we dive into the timeline, it’s important to grasp the basics of window film installation. Window film, also known as window tint, is a thin laminate film that can be installed on the interior or exterior of glass surfaces in homes and buildings. It’s used to reduce solar heat, enhance privacy, increase energy efficiency, and protect against UV rays. This versatile material is available in various styles and shades, allowing for customization to suit your specific needs and aesthetic preferences. For more detailed information about performance and applications, you can refer to the U.S. Department of Energy’s guide on window film.
In addition to its primary functions, window film can also contribute to the safety and security of your space. By holding shattered glass together, it reduces the risk of injury during accidents or break-ins. Additionally, some films are designed to prevent fading of interior furnishings by blocking harmful UV rays. The U.S. Environmental Protection Agency explains how UV radiation affects indoor environments. Understanding these benefits can help you make an informed decision when selecting the right window film for your project.
The first step in the window tinting process is the initial consultation. This involves a professional visiting your home or office to assess your needs and discuss your options. During this visit, the installer will evaluate the windows’ current condition and measure them to determine the appropriate amount of film required.
Needs Analysis: The installer will ask about your specific needs, such as reducing glare, improving privacy, or enhancing energy efficiency. Understanding your priorities helps in recommending the most suitable film options.
Product Recommendations: Based on your needs, the professional will recommend suitable window film options. They may show samples or portfolio images to help visualize the potential outcomes.
Cost Estimate: You’ll receive an estimate detailing the cost of the materials and installation. This includes a breakdown of labor, materials, and any additional charges for custom work or specialty films.
This step usually takes a couple of hours, depending on the size of your project. It’s an opportunity to ask questions and clarify any concerns before moving forward.
Once you’ve decided on the type of window film that suits your requirements, the next step is to place an order for the materials. This involves finalizing the film type, color, and any custom features you might desire.
Product Order: The installer will order the chosen film, which can take a few days to a week to arrive, depending on the availability and shipping time. Some specialty films may have longer lead times, so it’s important to plan accordingly.
Scheduling Installation: You’ll coordinate with the installer to schedule a convenient time for the installation. Consider any personal or business schedules to ensure minimal disruption during the installation process.
This stage is crucial for ensuring that all materials are ready and available for the installation day. Planning ahead helps prevent delays and ensures a smooth transition to the next phase.
Preparation is key to a successful window film installation. This step ensures that the environment is ready for the film application, minimizing any potential issues during installation.
Cleaning the Windows: The installation team will thoroughly clean the windows to remove any dirt or debris that could affect the film’s adhesion. This step is vital for ensuring a smooth, bubble-free application.
Room Preparation: Furniture may be moved away from windows to provide easy access for the installers. You may need to secure any delicate items in the area to prevent accidental damage.
This step can take a few hours, depending on the number of windows being tinted. Proper preparation facilitates a more efficient installation process and enhances the final outcome.
Installation day is when the transformation begins. The time required for this step varies based on the size and complexity of the project. Skilled installers work methodically to ensure precision and quality.
Film Application: The installer will carefully apply the window film to each window, ensuring no air bubbles or creases. This process requires precision and attention to detail to achieve a flawless finish.
Quality Check: After application, the installer will inspect the film for any imperfections and make necessary adjustments. They will address any issues promptly to ensure the best possible outcome.
For a standard home or office, installation can take from a few hours to a full day. Larger or more complex projects may require additional time, but the results are worth the investment.
After the installation, a thorough inspection ensures everything is up to standard. This step is crucial for guaranteeing that the film meets your expectations and performs as intended.
Customer Walkthrough: The installer will walk you through the completed project to ensure you’re satisfied with the results. This is an opportunity to address any concerns or ask questions about the installation.
Care Instructions: You’ll receive instructions on how to care for your newly tinted windows to maintain their appearance and functionality. Proper maintenance is essential for preserving the film’s effectiveness and longevity.
This final inspection ensures that the installation meets both your expectations and industry standards, providing peace of mind and satisfaction.
Window film requires time to cure and fully adhere to the glass. This step is crucial for the longevity and effectiveness of the film. Understanding this period helps in maintaining the integrity of the installation.
Curing Time: The curing period usually lasts from a few days to a couple of weeks, depending on the film type and weather conditions. Factors such as humidity and temperature can affect the curing process.
Avoid Cleaning: During this time, it’s important not to clean or disturb the film to prevent damage. Following care instructions ensures the film sets correctly and performs optimally.
Patience during the curing period is essential for achieving the best results, as this time allows the film to bond fully with the glass.
Precision: Professionals have the skills and tools to apply the film without bubbles or creases. Their expertise ensures that the film adheres properly and looks aesthetically pleasing.
Efficiency: Experienced installers work quickly and efficiently, minimizing disruption to your routine. Their streamlined processes ensure timely completion without compromising quality.
Warranty: Many professional installations come with a warranty, providing peace of mind. This assurance covers potential issues and enhances the value of your investment.
Professional installation not only guarantees quality but also adds a layer of security and assurance, making it a worthwhile investment.
Here are some tips to ensure a smooth and successful window tinting process:
Communicate Clearly: Be clear about your needs and expectations with the installer. Open communication helps prevent misunderstandings and ensures that your vision is realized.
Plan Ahead: Allow ample time for each step of the process, especially if you have a tight schedule. Scheduling in advance can help accommodate any unforeseen delays or changes.
Follow Care Instructions: Proper care and maintenance will extend the life of your window film. Adhering to guidelines ensures that your investment remains effective and attractive for years.
These tips can help streamline the process and enhance the overall experience, leading to a successful project outcome.
Window film installation is an excellent investment for enhancing the aesthetics and energy efficiency of your home or office. By understanding the window tint installation timeline and what to expect, you can plan effectively and ensure a smooth process. Whether you’re an interior designer seeking innovative solutions for your clients or a homeowner looking to improve your living space, professional window tinting offers a host of benefits. With the right preparation and knowledge, you’ll enjoy the many advantages of window film for years to come. Embracing these insights allows you to make informed decisions, ensuring that your space is both beautiful and functional.
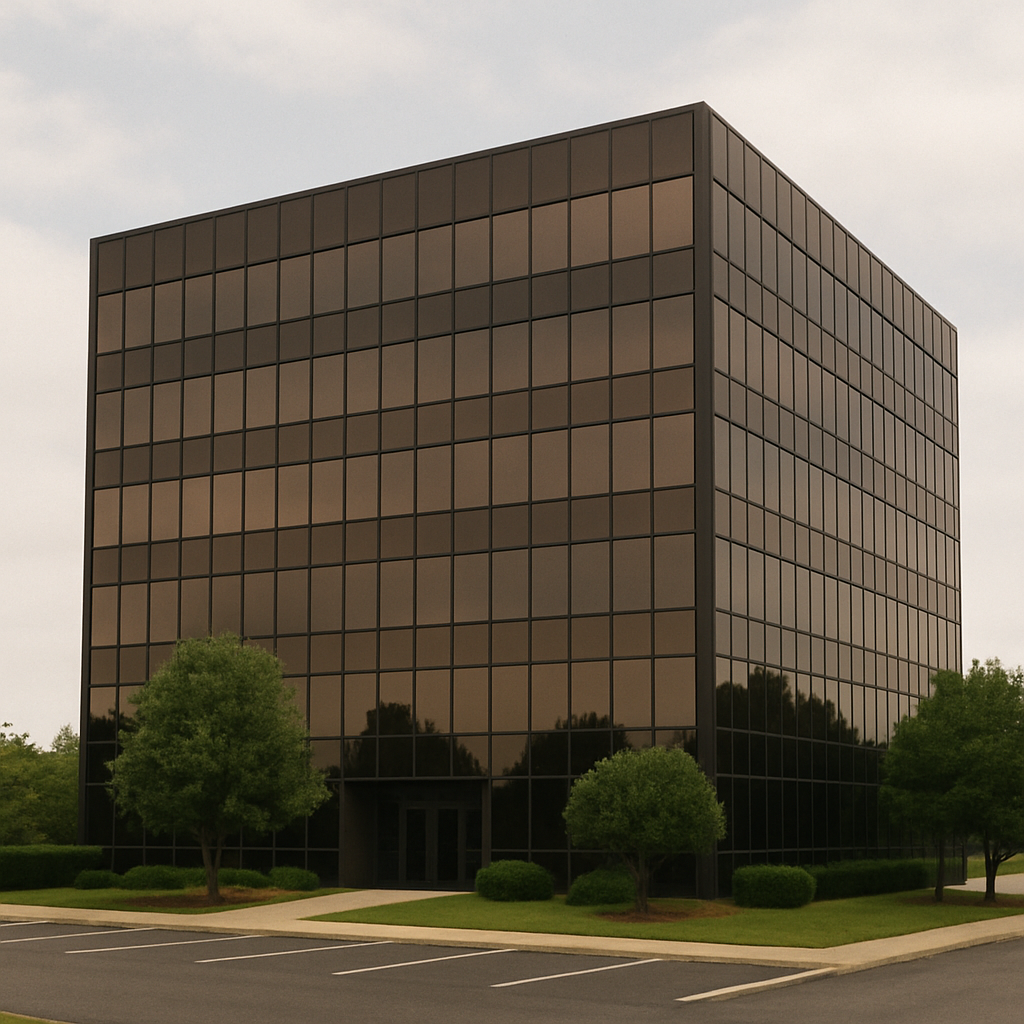
In the world of commercial property management, finding cost-effective solutions that also enhance aesthetics and improve energy efficiency can be a challenge. Commercial window tinting is an often-overlooked solution that offers significant benefits, including energy savings, improved comfort, and an attractive return on investment (ROI). It is an investment that not only addresses immediate operational concerns but also aligns with long-term strategic goals for sustainability and efficiency.
In this article, we’ll explore the various advantages of commercial window tinting and how it can be a wise investment for businesses. From financial benefits to environmental impact, window tinting offers a holistic solution that caters to a wide array of business needs. Understanding these advantages can empower property managers to make informed decisions that bolster both the bottom line and the overall appeal of their buildings.
Commercial window tinting involves applying a thin film to the interior or exterior of a building’s windows. This film is designed to control the amount of sunlight and heat that enters the building, offering a range of benefits from improved energy efficiency to enhanced privacy. The versatility of window films means they can be tailored to meet specific needs, whether for a high-rise office building or a small retail space.
What Does Window Tinting Involve?
The process of window tinting includes selecting the right type of film based on the building’s needs. There are various types of films, including solar control films, security films, and decorative films. Each serves a unique purpose, such as reducing glare, increasing privacy, or adding a stylistic element to the building. Installation is typically quick and minimally disruptive, ensuring that business operations can continue smoothly.
Choosing the right film requires an understanding of the building’s exposure to sunlight, the level of privacy required, and the aesthetic goals of the business. Professional installers can assess these factors and recommend the most suitable options, ensuring that the window tinting not only meets functional needs but also complements the building’s design.
Common Misconceptions
A common misconception is that window tinting will drastically darken the interior of a building. However, modern films are designed to let in natural light while blocking harmful UV rays and reducing heat. This ensures that spaces remain bright and welcoming. In fact, many films are virtually undetectable once installed, maintaining the building’s natural appearance while enhancing its functionality.
Another misconception is that window tinting is only beneficial in sunny climates. While it’s true that the benefits are more pronounced in areas with abundant sunlight, window tinting can also provide advantages in cooler climates by maintaining indoor temperatures and reducing heating costs. This makes it a versatile solution for businesses regardless of geographic location.
The Financial Benefits of Window Tinting
One of the primary reasons businesses consider window tinting is its ability to reduce energy costs significantly, contributing to a compelling ROI. The financial implications of window tinting extend beyond immediate savings, offering long-term benefits that can substantially impact a company’s financial health.
Energy Savings and Cost Reduction
Window film can dramatically reduce the amount of heat entering a building, which means less reliance on air conditioning systems to maintain a comfortable temperature. By reducing the demand on HVAC systems, businesses can see a notable decrease in energy bills. According to the International Window Film Association, window films can reduce cooling costs by up to 30%. These savings can be reinvested into other areas of the business, fostering growth and innovation.
In addition to cooling cost savings, window tinting can also reduce heating expenses in colder months by insulating windows and preventing heat loss. This year-round impact on energy consumption further enhances the financial attractiveness of window tinting, providing a comprehensive approach to energy management.
Extending the Life of Interior Furnishings
UV rays can cause significant damage to interior furnishings, leading to fading and deterioration over time. Window films can block up to 99% of these harmful rays, preserving the integrity of furniture, carpets, and artwork, and reducing the need for costly replacements. This protection ensures that interior spaces maintain their aesthetic appeal and functionality for years to come.
By extending the lifespan of interior furnishings, businesses can allocate their budgets more effectively, focusing on improvements and innovations rather than replacement costs. This not only enhances the aesthetic appeal of the space but also contributes to the company’s sustainability efforts by reducing waste.
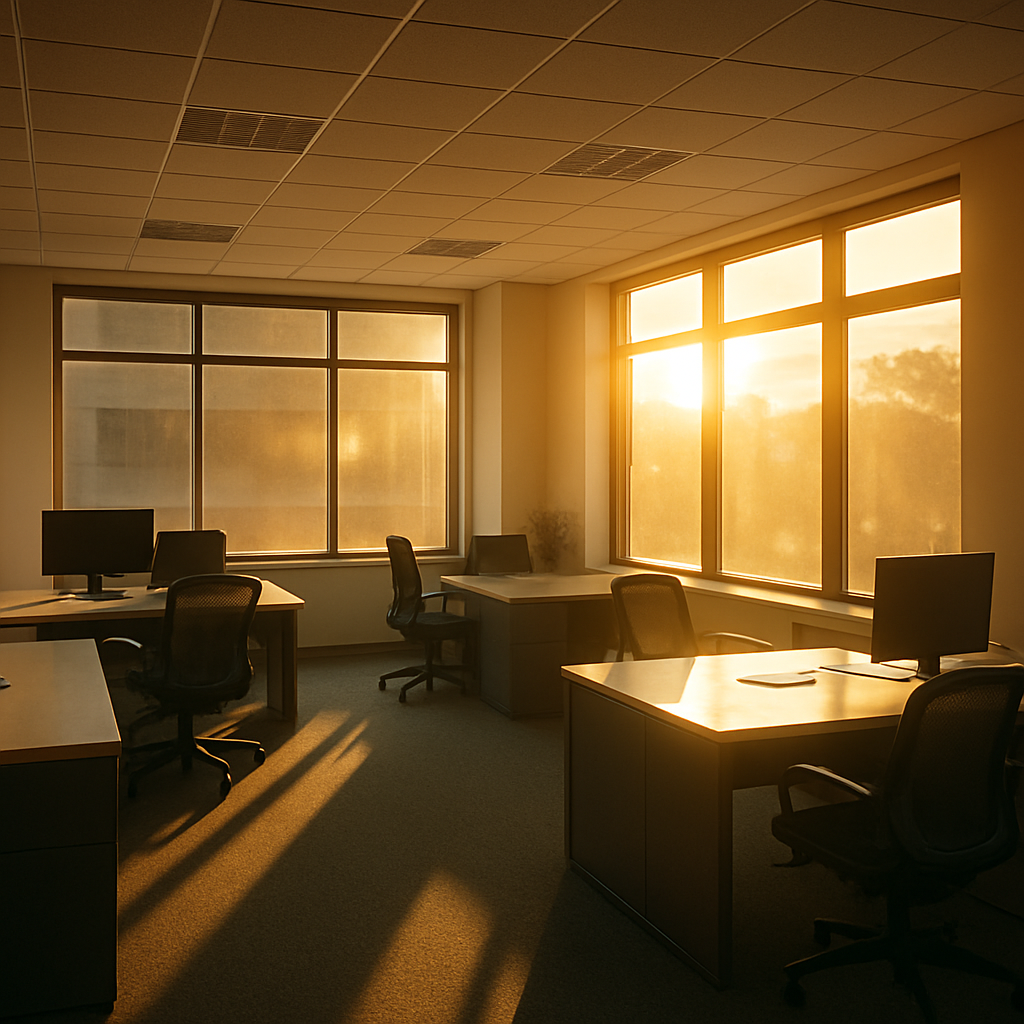
Enhancing Comfort and Productivity
Beyond financial savings, window tinting can create a more comfortable and productive environment for employees and customers. The impact on comfort and productivity is significant, as it addresses common workplace challenges such as glare and temperature fluctuations.
Reducing Glare and Eye Strain
Glare from the sun can be a major distraction, causing eye strain and reducing productivity. By minimizing glare, window films create a more conducive work environment, allowing employees to focus better and work more efficiently. This can lead to increased job satisfaction and a reduction in workplace errors, contributing to overall business success.
The reduction in glare is particularly beneficial in environments where computer screens are used extensively, as it reduces the need for additional lighting and enhances screen visibility. This improvement in working conditions can have a positive impact on employee health and morale, leading to a more engaged and motivated workforce.
Improving Temperature Regulation
Window films help maintain consistent indoor temperatures, reducing hot spots near windows and making the entire space more comfortable. This can lead to increased satisfaction and productivity among employees and a more pleasant experience for customers. Consistent temperatures also prevent overuse of HVAC systems, extending their lifespan and reducing maintenance costs.
By providing a stable and comfortable indoor environment, businesses can reduce employee turnover and improve customer retention. A comfortable space reflects well on the business, enhancing its reputation and appeal to both current and potential clients.
Environmental Impact and Sustainability
by wei (https://unsplash.com/@chanwei_snap)
As businesses strive to become more environmentally conscious, window tinting offers a simple way to reduce their carbon footprint. The environmental benefits of window tinting align with global trends towards sustainability and responsible business practices.
Lowering Energy Consumption
By decreasing the reliance on air conditioning, window tinting helps reduce overall energy consumption. This not only lowers utility bills but also minimizes the environmental impact of a building’s operations. The reduction in energy use contributes to a decrease in greenhouse gas emissions, supporting global efforts to combat climate change.
Implementing energy-efficient solutions like window tinting demonstrates a commitment to sustainable practices, enhancing a company’s reputation as an environmentally responsible entity. This can be a key differentiator in competitive markets, appealing to eco-conscious consumers and clients.
Supporting Green Building Initiatives
Window tinting can contribute to achieving LEED (Leadership in Energy and Environmental Design) certification points. This certification is a globally recognized symbol of sustainability achievement and leadership, and having it can enhance a company’s reputation and appeal. LEED certification can also open up new business opportunities, particularly with organizations that prioritize sustainability in their partnerships and procurement processes.
Beyond LEED, window tinting can support other green building initiatives by contributing to healthier indoor environments and reducing energy demand. This alignment with sustainability goals ensures that businesses can meet regulatory requirements and participate in various environmental programs.
The Aesthetic Appeal of Window Tinting
Window films are available in various styles and finishes, allowing businesses to enhance the visual appeal of their buildings without undergoing major renovations. The aesthetic benefits of window tinting complement its functional advantages, offering a comprehensive solution for modern businesses.
Customizable Options
Businesses can choose from a range of tinting options to suit their aesthetic preferences and functional needs. Whether it’s a sleek, modern look or a more traditional appearance, there’s a window film to match every design vision. Customizable options ensure that businesses can maintain their brand identity and create spaces that resonate with their values and culture.
The ability to tailor window films to specific design requirements allows businesses to experiment with different styles and finishes, enhancing the overall look and feel of their buildings. This flexibility makes window tinting an attractive option for businesses looking to refresh their image or adapt to changing trends.
Privacy and Security Enhancements
In addition to aesthetics, certain window films can increase privacy by obscuring the view into a building, protecting sensitive information and enhancing security. Security films can also add a layer of protection against break-ins by making windows more resistant to shattering. This dual function of privacy and security ensures that businesses can protect their assets and maintain a safe environment for employees and clients.
The enhanced security provided by window films is particularly valuable in urban areas or locations with higher crime rates, offering peace of mind to business owners and staff. This additional layer of protection can also reduce insurance premiums, adding another dimension to the financial benefits of window tinting.
Calculating the Return on Investment
The initial cost of window tinting varies based on the size of the building, type of film, and installation specifics. However, the long-term savings and benefits often outweigh the initial investment. Understanding the factors that influence ROI can help businesses make informed decisions about window tinting.
Factors Affecting ROI
To calculate the ROI of window tinting, consider the following factors:
Reduction in energy costs
Decreased wear and tear on furnishings
Increased comfort and productivity
Extended lifespan of HVAC systems
These factors collectively contribute to a comprehensive assessment of the financial and operational benefits of window tinting. By analyzing these elements, businesses can forecast the potential savings and determine the timeline for recouping their investment.
Real-Life Example: A Case Study
Consider a mid-sized office building that invests in solar control window films. After installation, the building sees a 25% reduction in energy costs and fewer complaints about temperature discomfort from employees. Over five years, the energy savings alone cover the cost of the window films, resulting in a positive ROI. This case study illustrates how window tinting can deliver tangible benefits, reinforcing its value as a strategic investment.
The success of this investment is further highlighted by improved employee satisfaction and productivity, demonstrating the multifaceted advantages of window tinting. By considering similar case studies, businesses can better understand the potential outcomes and tailor their window tinting strategies to achieve optimal results.
Conclusion
Commercial window tinting is a smart investment for businesses looking to improve energy efficiency, enhance comfort, and add aesthetic appeal to their buildings. With its ability to deliver substantial energy savings and contribute to a more sustainable operation, window tinting is a viable solution for any commercial property owner. The blend of financial, environmental, and aesthetic benefits makes window tinting a comprehensive solution for modern business challenges.
Whether you aim to improve employee productivity, protect interior assets, or simply reduce energy costs, window tinting offers a practical and cost-effective solution that pays for itself over time. Consider how this innovative approach can benefit your business today. By embracing the advantages of window tinting, businesses can position themselves for success in an increasingly competitive and environmentally conscious market.