Window films have evolved as a popular solution for homeowners and interior designers looking to enhance privacy, improve aesthetics, and boost energy efficiency. However, choosing between exterior and interior window films can be challenging. In this article, we will explore when exterior window films should be used instead of interior ones, and how they can benefit your home.
Window films are thin layers applied to glass surfaces to provide benefits like UV protection, glare reduction, and increased privacy. According to the U.S. Department of Energy, properly selected window films can help reduce heat gain and improve overall building energy performance. They come in various types such as decorative, solar control, and security films, each designed to address specific needs.
Types of Window Films
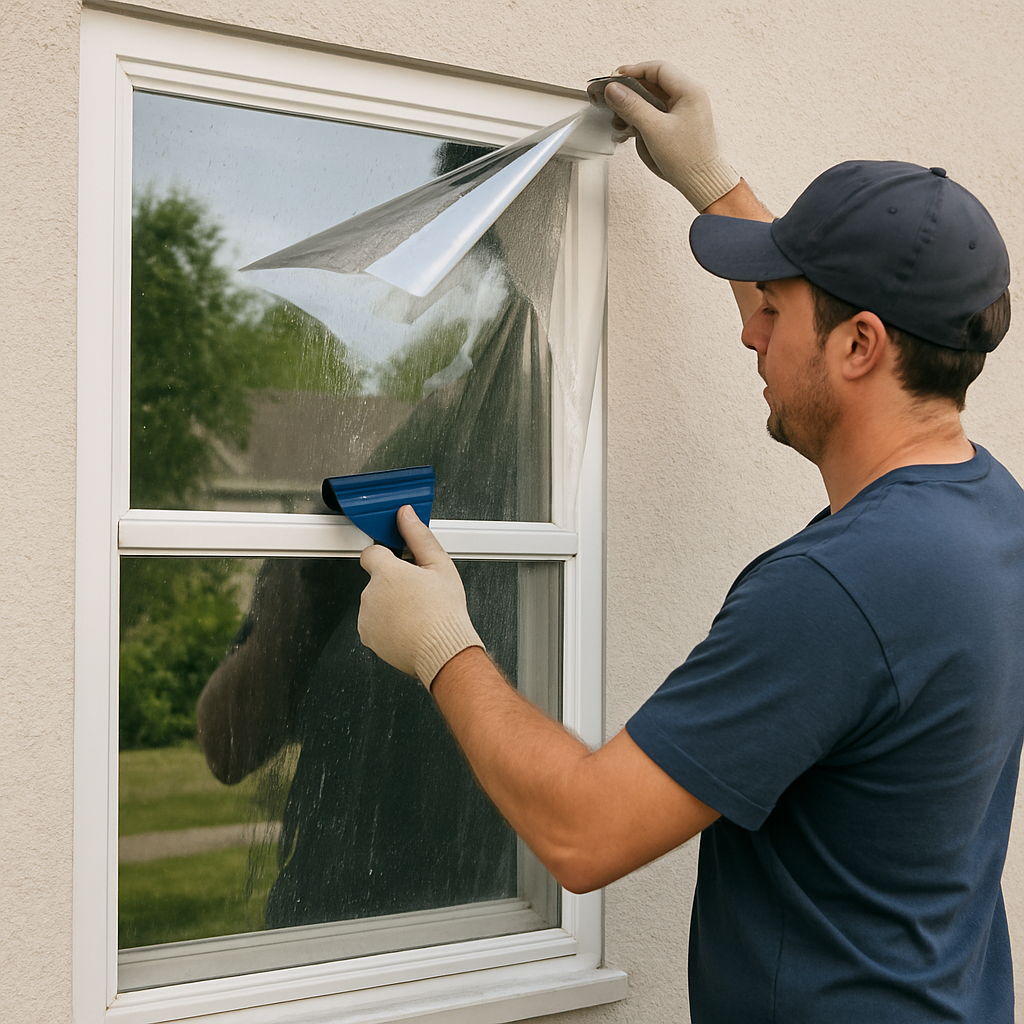
Exterior Window Films: These are applied to the outside of the window glass. They are particularly useful in scenarios where interior access is limited or the interior surfaces are not suitable for film application.
Interior Window Films: These are installed on the inside of the window glass. They are more common and preferred for their durability and ease of maintenance.
When to Choose Exterior Window Films
Choosing between exterior and interior window films depends on several factors. Here are some scenarios where exterior window films are the preferred choice:
Limited Interior Access
In some architectural designs, accessing the interior side of a window for film application can be challenging. This is common in high-rise buildings or windows with heavy furniture blocking access. Exterior window films provide a viable solution in such cases.
Enhanced Solar Control
Exterior window films are highly effective in reducing heat gain and glare before they penetrate the glass. This can significantly improve interior comfort, making it an excellent choice for windows facing direct sunlight, especially in warmer climates. The U.S. Environmental Protection Agency (EPA) highlights the importance of energy-efficient window solutions in reducing cooling demands and improving indoor comfort.
Preserving Interior Aesthetics
For homes with intricate interior designs or valuable artwork near windows, exterior films prevent the need to alter the interior aesthetics while still providing the benefits of window films.
Exterior window films come with unique advantages that can make them the ideal choice for specific situations.
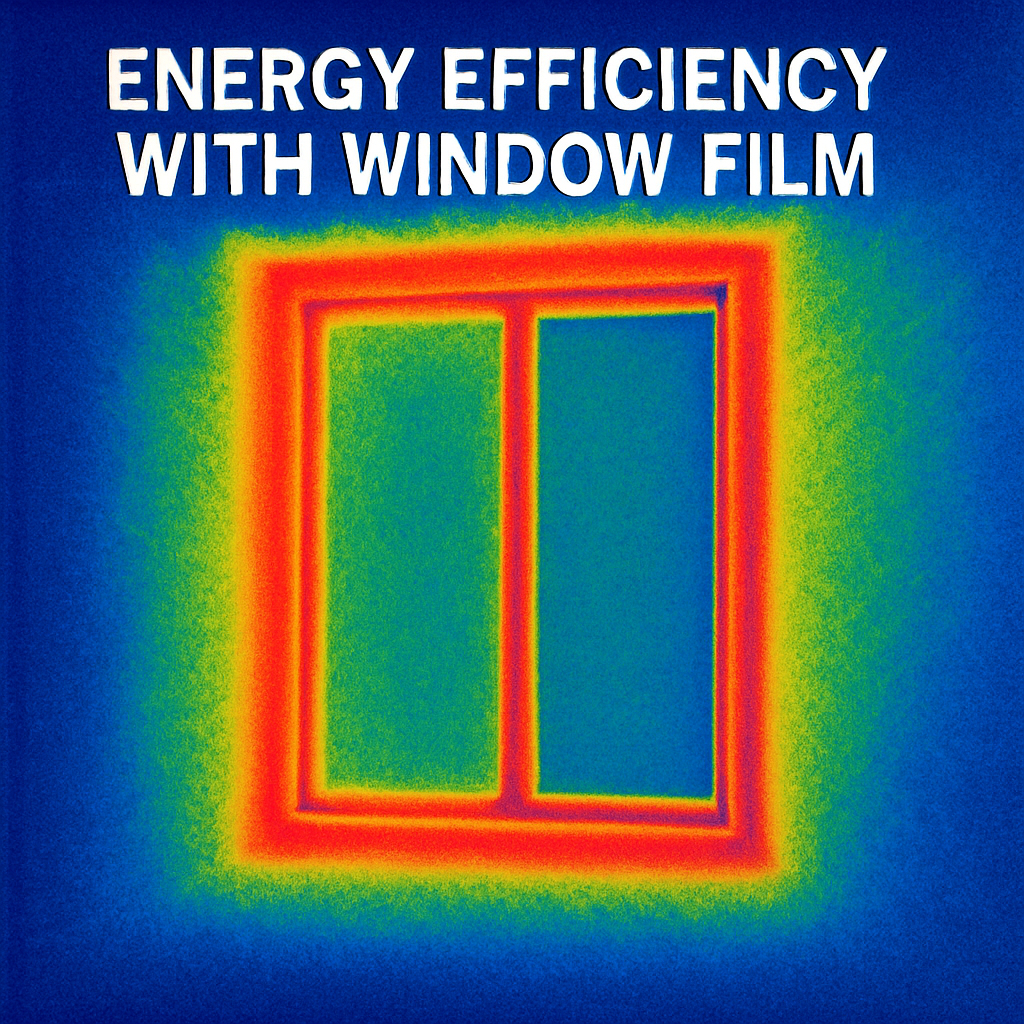
Increased Energy Efficiency
Exterior films can greatly enhance a building’s energy efficiency by reflecting more solar energy and reducing heat absorption. This can lead to lower cooling costs during hot months.
Superior Glare Reduction
By blocking sunlight before it enters the glass, exterior films provide superior glare reduction, making it easier to enjoy natural light without the discomfort of direct sun exposure.
Enhanced Durability
Exterior window films are built to withstand harsh environmental conditions, such as rain, wind, and UV radiation. This makes them a durable option for windows exposed to the elements.
Privacy and Decorative Options
Privacy Window Film
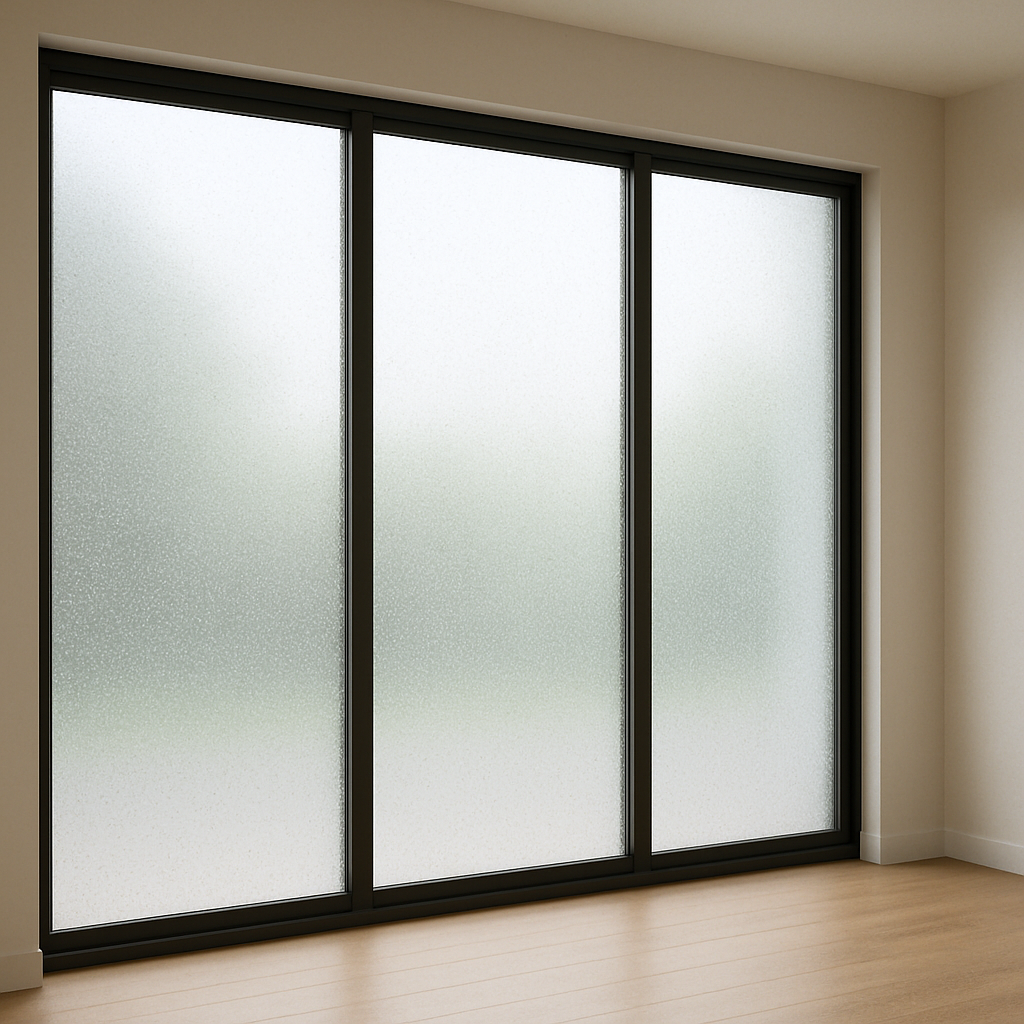
Exterior films can also be used to enhance privacy by obstructing views from outside while maintaining visibility from inside. This makes them ideal for bathrooms, ground-level windows, or any area where privacy is a concern.
Decorative Window Film
For those looking to add a touch of style, decorative exterior films offer various patterns and designs. These films can enhance the curb appeal of a property while providing the functional benefits of window films.
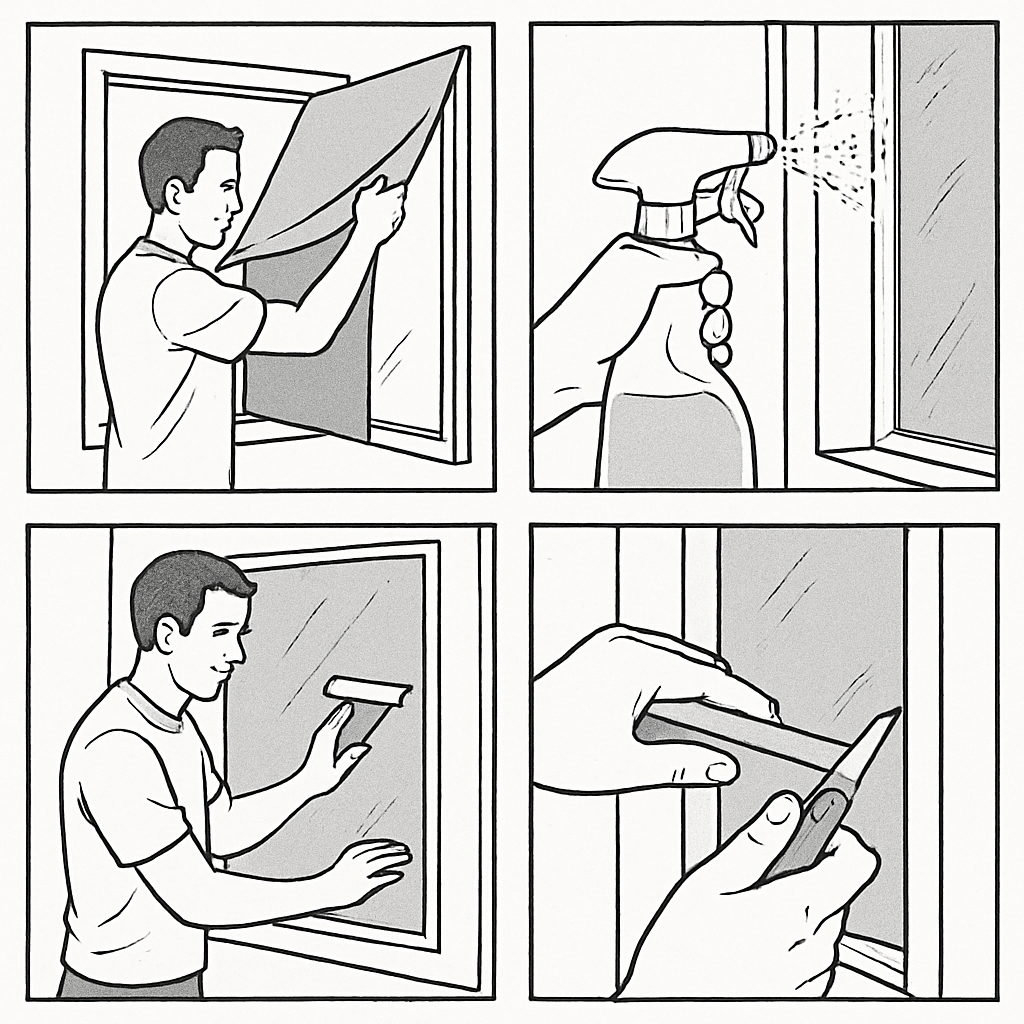
Installation and Maintenance
While exterior window films offer several benefits, proper installation and maintenance are crucial to ensure their longevity and performance.
Professional Installation
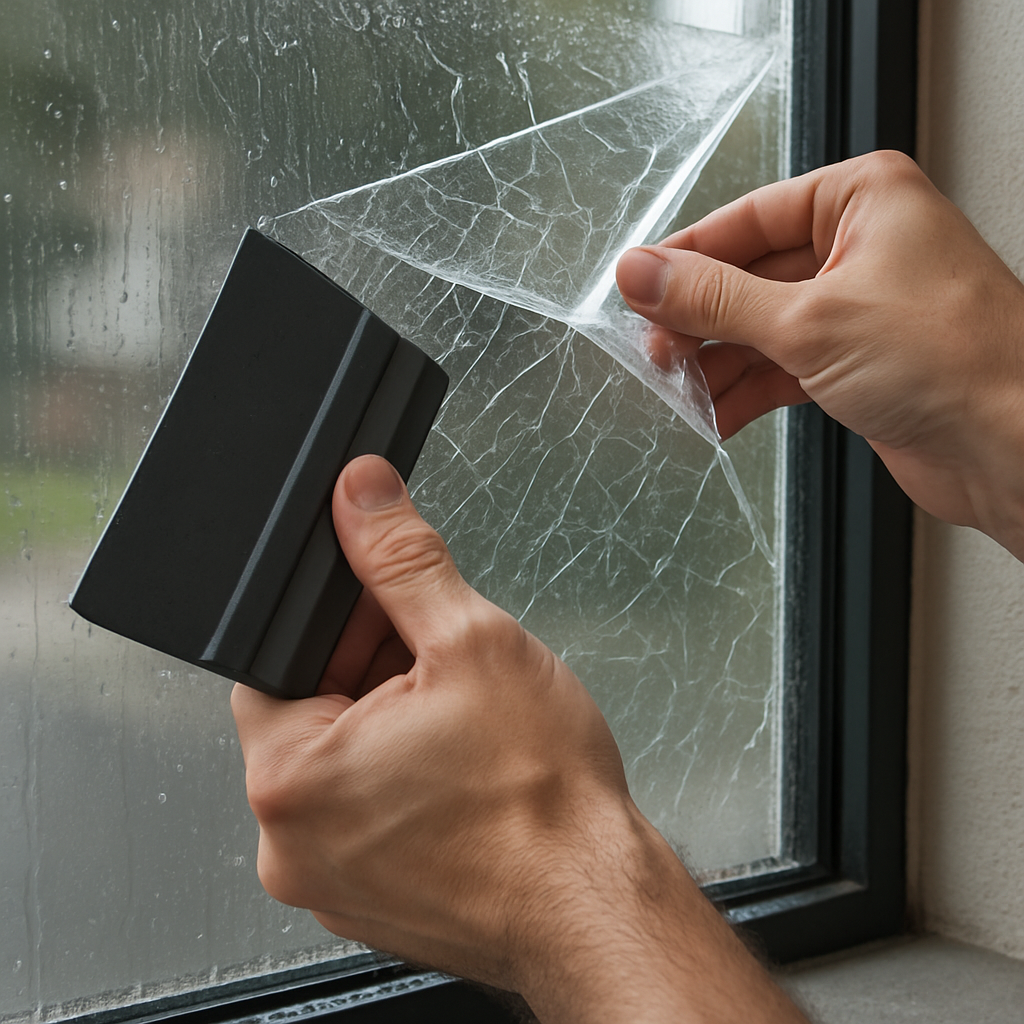
It is highly recommended to have exterior window films professionally installed. Professionals have the expertise to ensure proper adhesion and can address any challenges that arise during installation.
Maintenance Tips
To maintain exterior window films, regular cleaning with non-abrasive solutions is recommended. Avoid using harsh chemicals or abrasive cleaning tools, as these can damage the film.
Conclusion
Exterior window films are an excellent solution for scenarios where interior films are impractical or when enhanced solar control and privacy are desired. By understanding the unique benefits and appropriate applications of exterior window films, homeowners and interior designers can make informed decisions that enhance both the functionality and aesthetics of living spaces.
Choosing the right window film involves considering factors such as access, energy efficiency, and design preferences. With the guidance of a professional installer, you can ensure that your window film choice perfectly complements your home or project needs.
By leveraging the benefits of exterior window films, you can enjoy a more comfortable, stylish, and energy-efficient living environment.
When it comes to home improvement, maintaining privacy without sacrificing style can be a challenge, especially in spaces like the bathroom. Enter bathroom window privacy film—a versatile solution that adds both elegance and privacy to your windows. But, as with any home improvement project, there are potential pitfalls to avoid. This article will guide you through the common mistakes and provide tips for a successful installation.
Bathroom window privacy film is a thin layer of vinyl or polyester applied to glass windows. It’s designed to obscure the view from outside while still allowing light to pass through, offering privacy without darkening the room. Available in various styles—such as frosted, etched, or patterned designs—privacy film is a popular choice for homeowners looking to enhance bathroom privacy without the need for curtains or blinds.
Benefits of Privacy Window Film
Enhanced Privacy: The primary benefit is privacy. It prevents outsiders from peering into your bathroom, which is essential for comfort and security.
Natural Light: Unlike curtains, privacy films allow natural light to filter in, maintaining a bright and inviting atmosphere.
Energy Efficiency: Some films can block UV rays, reducing heat gain and helping to keep your bathroom cooler, which can lower energy bills.
Aesthetic Appeal: With a range of styles and designs, window films can add a decorative touch to your space, complementing your overall interior design.
Common Pitfalls to Avoid
Incorrect Measurements
One of the most frequent mistakes is improper measurement. Privacy films need to fit precisely to avoid bubbles and ensure the film adheres correctly.
Tip: Measure your window’s width and height at three different points and use the smallest measurement to cut your film. It’s better to cut slightly larger and trim as needed.
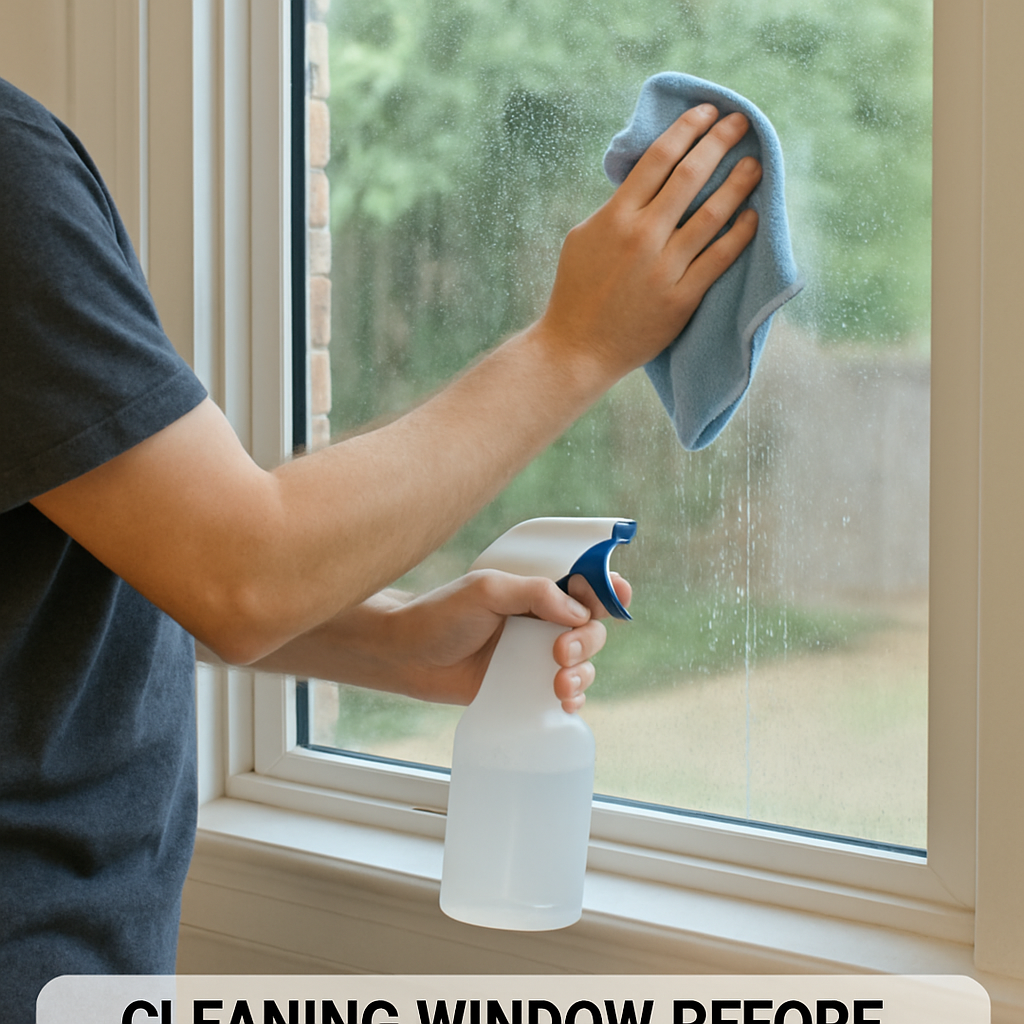
Poor Surface Preparation
Applying film to a dirty or oily window can lead to poor adhesion and a less effective installation. Dirt and debris can create bubbles and wrinkles in the film.
Tip: Thoroughly clean the window using a non-abrasive cleaner and a lint-free cloth. Ensure the glass is completely dry before application.
Ignoring Manufacturer Instructions
Each privacy film product may have unique installation requirements. Ignoring these can lead to issues like peeling, bubbling, or ineffective privacy.
Tip: Read and follow the manufacturer’s instructions carefully. They often provide insights specific to their product that can enhance your installation process.
Rushing the Installation
Installing privacy film requires patience. Rushing can lead to misalignments, air bubbles, and uneven cuts.
Tip: Allocate sufficient time for the installation process. Work slowly and methodically, using a squeegee to smooth out bubbles as you apply the film.
Choosing the Right Privacy Film
Consider Your Aesthetic Needs
Privacy films come in a variety of styles. Whether you prefer a classic frosted look or a more decorative pattern, choose a film that complements your bathroom’s design.
Assess the Level of Privacy Required
Not all films offer the same level of opacity. Consider how much privacy you need and choose a film that meets those needs while still allowing natural light.
Evaluate Energy Efficiency Features
Some films offer additional benefits, such as UV protection and insulation. If energy efficiency is a priority, look for films with these features.
Installation Guide
by Cam Ballard (https://unsplash.com/@cam_ballard)
Gather Your Tools: You’ll need a sharp utility knife, squeegee, spray bottle with soapy water, measuring tape, and a lint-free cloth.
Clean the Window: As mentioned, ensure the window is clean and dry.
Cut the Film: Measure and cut the film to size, leaving a little extra on the edges.
Apply the Film: Spray the window with soapy water. Peel the backing from the film and position it on the window.
Smooth Out Bubbles: Use a squeegee to press the film onto the glass, smoothing out any air bubbles from the center outward.
Trim the Excess: Once the film is securely in place, use a utility knife to trim the excess around the edges.
Maintenance and Longevity
Regular Cleaning
To maintain the appearance and effectiveness of your privacy film, clean it regularly. Use a mild detergent and a soft cloth to avoid scratching the film.
Monitor for Peeling or Bubbling
Over time, the film may start to peel or develop bubbles, especially at the edges. Address these issues promptly to extend the film’s lifespan.
Tip: If bubbling occurs, use a needle to puncture the bubble and smooth it out with a squeegee.
Conclusion
Bathroom window privacy film is a cost-effective and stylish solution for enhancing privacy and improving the aesthetics of your bathroom. By avoiding common pitfalls and following proper installation techniques, you can enjoy the benefits of privacy film for years to come. Whether you’re an interior designer seeking to offer clients innovative solutions or a homeowner looking to upgrade your space, privacy film can be a valuable addition to any bathroom.
# Everything Homeowners Must Know About Mirror Tint For House Windows
When it comes to home improvement, window tinting might not be the first thing that comes to mind. However, adding mirror tint to house windows offers a multitude of benefits that go beyond just aesthetic appeal. In this article, we will explore everything you need to know about mirror tint for house windows, including its benefits, installation process, and how it can enhance the comfort and efficiency of your home.
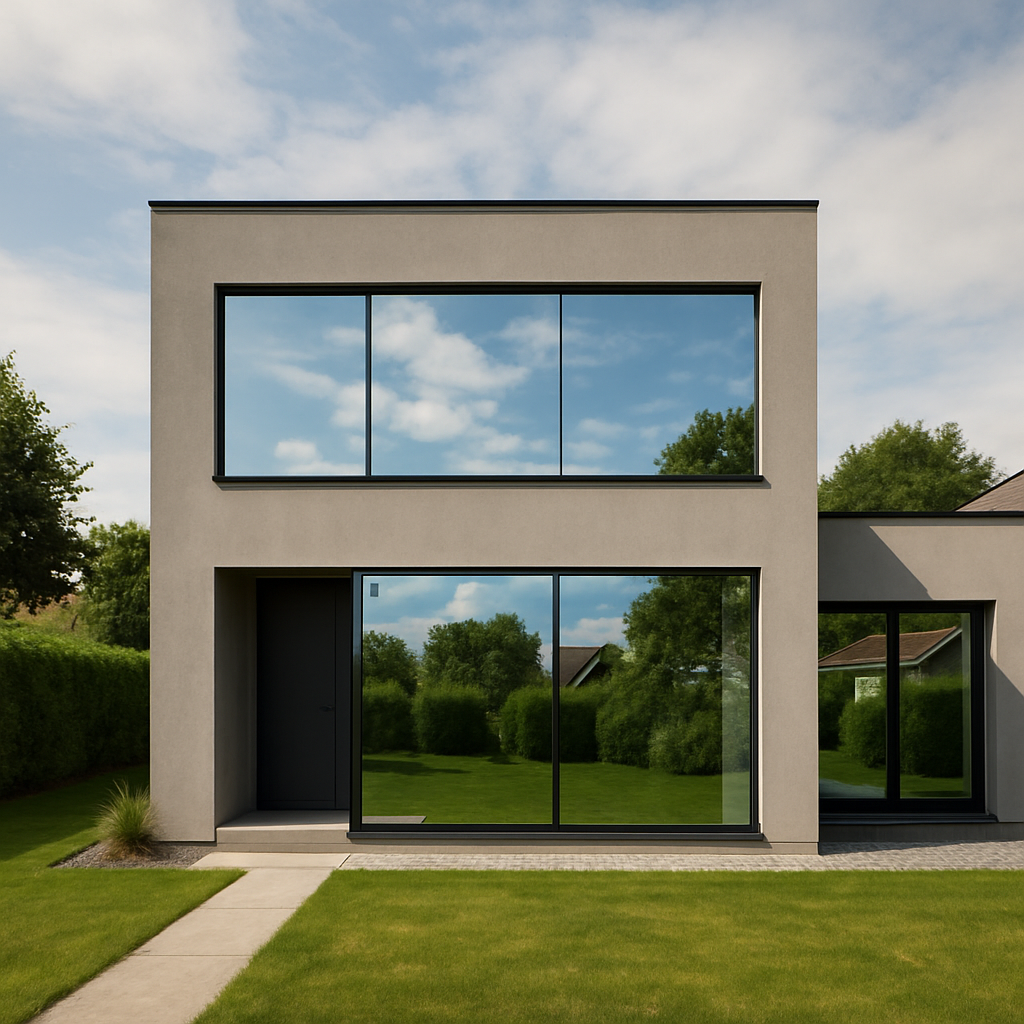
Mirror tint, also known as reflective window film, is a type of home window tinting that provides a mirrored effect on the exterior side of your windows. This reflective film is designed to improve privacy, reduce glare, and enhance energy efficiency by reflecting sunlight away from your home.
The Science Behind Mirror Tint
The mirror effect is achieved through a thin layer of metallic coating within the film. This coating reflects light, creating a mirrored appearance from the outside. During the day, this tint allows you to see outside while preventing others from seeing in, offering an added layer of privacy.
Benefits of Mirror Tint for House Windows
Enhanced Privacy
One of the primary benefits of mirror tint is the enhanced privacy it provides. With reflective window film, you can enjoy the view outside without worrying about prying eyes peering into your living space. This is especially useful for homes situated in busy neighborhoods or near public areas.
Energy Efficiency
Reflective window film helps to improve your home’s energy efficiency by reducing the amount of heat entering through your windows. By reflecting sunlight, mirror tint can significantly lower cooling costs during the hot summer months. This makes it an eco-friendly option for homeowners looking to reduce their carbon footprint and save on energy bills.
UV Protection
Mirror tint provides protection against harmful ultraviolet (UV) rays, which can cause damage to furniture, flooring, and other interior elements. By blocking up to 99% of UV rays, reflective window film helps preserve the color and quality of your home furnishings.
Glare Reduction
Excessive glare can be a nuisance, especially when trying to work from home or relax in front of the television. Mirror tint helps reduce glare, making your home environment more comfortable and allowing you to enjoy your favorite activities without straining your eyes.
Aesthetic Appeal
Beyond its functional benefits, mirror tint adds a sleek and modern look to your home’s exterior. It can enhance the overall appearance of your property, making it stand out in the neighborhood while complementing your home’s architectural style.
Installation Process of Mirror Tint
Professional vs. DIY Installation
While DIY window tinting kits are available, professional installation is recommended to ensure a flawless finish and optimal performance. Professionals have the experience and tools necessary to apply the film without bubbles or creases, ensuring long-lasting results.
Steps Involved in Installation
Consultation and Assessment: A professional installer will evaluate your windows, discuss your needs, and recommend the best type of mirror tint for your home.
Preparation: The windows are thoroughly cleaned to remove any dust or debris that could affect the adhesion of the film.
Film Application: The reflective window film is carefully applied to the interior side of the windows. Installers use specialized tools to smooth out the film and eliminate air bubbles.
Curing Time: After installation, the film requires a curing period during which it fully adheres to the glass. This can take several days, depending on weather conditions.
by ihor (https://unsplash.com/@ishlpnk)
Maintenance and Care of Mirror Tint
Once installed, mirror tint requires minimal maintenance. Here are some tips to keep your reflective window film in top condition:
Cleaning: Use a soft cloth and a mild soap solution to clean the tinted windows. Avoid abrasive materials or harsh chemicals that could damage the film.
Inspection: Regularly inspect the film for any signs of peeling or bubbling. If any issues arise, contact a professional for repairs.
Cost Considerations
The cost of mirror tint for house windows varies based on factors such as the size of the windows, the type of film chosen, and whether professional installation is used. While the initial investment may seem significant, the long-term savings on energy bills and the added value to your home make it a worthwhile investment.
Conclusion
Mirror tint for house windows offers a practical and stylish solution for homeowners seeking to enhance privacy, improve energy efficiency, and protect their interiors from UV damage. With its numerous benefits, reflective window film is an excellent choice for those looking to improve their living spaces while reducing energy costs. Whether you choose professional installation or a DIY approach, mirror tint is a home improvement investment that pays off in comfort and savings.
For interior designers, incorporating mirror tint into your projects can provide clients with an eco-friendly and cost-effective solution that aligns with their aesthetic and functional goals. By offering this innovative window treatment, you can help clients achieve a balance between style, privacy, and sustainability.
Reflecting on these insights, it’s clear that mirror tint is more than just a decorative addition—it’s a smart, efficient choice for modern homeowners.
As daylight fades and the evening settles in, the importance of maintaining privacy in your home increases significantly. This is especially true for homes with expansive windows or those situated close to the street. Nighttime privacy window films offer an ideal solution, allowing homeowners to achieve seclusion without compromising on style or natural light. With a multitude of options available in the market, selecting the right film can be challenging. Here, we delve into the most effective nighttime privacy window films and explore how they can elevate your living space.
Privacy window treatments are innovative films that adhere to your windows, creating a barrier that ensures privacy while still letting natural light brighten your home. These films are versatile and can be customized to accommodate any window size or style, making them a popular and cost-effective choice for modern homes. In addition to privacy, these films can also contribute to energy efficiency by regulating heat and light, thus reducing your reliance on artificial lighting and air conditioning.
While traditional window solutions like curtains and blinds work well during the day, they often fall short at night when indoor lights are on. During these times, tinted or reflective films may not offer the same level of privacy, leaving interiors exposed to the outside world. Specialized nighttime window privacy films address this issue, providing an effective barrier against prying eyes even when the lights are on. This ensures that your home remains a private sanctuary, allowing you to relax and unwind without worry.
Nighttime privacy films are particularly beneficial for rooms that require both light and privacy, such as living rooms, kitchens, and bathrooms. By choosing the right film, you can enjoy the best of both worlds—ample natural light during the day and complete privacy at night.
There is a diverse range of window films available, each offering distinct benefits tailored to different privacy needs and aesthetic preferences. Understanding the various types of films can help you make an informed decision that aligns with your requirements.
Blackout films are designed to provide total privacy by completely blocking visibility from both sides of the window. These films are ideal for spaces where privacy and light control are paramount, such as bedrooms and home theaters. In addition to privacy, blackout films can aid in temperature regulation by preventing sunlight from entering during the day, thereby keeping rooms cooler.
Complete privacy, ensuring no visibility from outside
Excellent control over light, ideal for creating dark environments
Energy-efficient, contributing to reduced cooling costs
Eliminates visibility, restricting views of the outside world
May significantly darken rooms, affecting ambiance
Frosted films offer a chic, opaque appearance that allows light to diffuse through while obscuring visibility. These films are perfect for areas like bathrooms or street-facing windows where you want to maintain light entry but need privacy.
Allows for natural light while maintaining privacy
Adds a decorative and stylish touch to windows
Simple and quick to install, with minimal maintenance
Limits visibility, potentially affecting views
May not provide complete darkness, depending on thickness
Reflective films feature a mirrored exterior that reflects light, making it difficult for outsiders to see in. While they excel during daytime, advanced options are available that work effectively at night as well.
Provides privacy both day and night, depending on the film
Offers UV protection, safeguarding interiors from sun damage
Reduces glare, enhancing comfort within the home
Can diminish visibility from inside at night
May not complement all architectural styles
Dual-reflective films combine a reflective finish on the outside with a tinted finish on the inside, offering a balance between privacy and exterior views. These films provide privacy without compromising the view of the outdoors.
Ensures balanced privacy, effective during both day and night
Maintains a clear view of the outside, enhancing the living experience
Reduces heat gain and glare, improving energy efficiency
May not suit all interior designs, requiring careful selection
Generally higher cost compared to single-layer films
While installing window films might seem straightforward, achieving a flawless finish often requires professional expertise. A professional installer ensures precise application, minimizing bubbles and ensuring longevity. Once installed, maintaining these films is simple; a gentle wipe with a soft cloth and a non-abrasive cleaner is usually sufficient to keep them looking pristine.
The key to selecting the right window film lies in understanding your specific needs, the intended use of each room, and your aesthetic preferences. Window films offer interior designers a unique opportunity to blend functionality with style, providing clients with solutions that enhance comfort, privacy, and energy efficiency.
Many manufacturers now offer custom design options, allowing homeowners to personalize their window films. Whether it’s a specific pattern, color, or even a logo, customization adds a personal touch that complements your home’s interior design. This flexibility ensures that the films not only serve a functional purpose but also enhance the overall aesthetic appeal of your space.
For those prioritizing sustainability, eco-friendly films made from recyclable or sustainable materials are available. These films not only protect privacy but also contribute to energy savings by optimizing natural light use and reducing the need for artificial lighting and heating or cooling. According to the U.S. Department of Energy, properly selected window films can improve energy performance in residential buildings. Additionally, the U.S. Environmental Protection Agency highlights the importance of energy-efficient upgrades in reducing overall household energy consumption. Opting for eco-friendly films aligns with a growing trend towards sustainable living and can be a significant selling point for environmentally conscious homeowners.
Investing in nighttime privacy window films is a strategic decision for homeowners seeking to enhance both privacy and style in their living spaces. With a variety of options ranging from blackout to dual-reflective films, there’s a solution tailored to every need and design preference. By understanding the distinct benefits and potential drawbacks of each type, you can make an informed choice that not only enhances your living space but also ensures your privacy.
Whether you’re an interior designer offering clients cutting-edge solutions or a homeowner looking to upgrade your space, the right window film can transform your home into a private, comfortable haven. Remember, professional installation can make a significant difference in the quality and longevity of the films, so consider this investment for optimal results. Enjoy the peace of mind that comes with enhanced privacy and style, and relish in a home that truly feels like your sanctuary.
# Boost Energy Efficiency with Security Film For Windows
Homeowners today are increasingly seeking ways to make their homes more energy-efficient while also maintaining security. One often overlooked solution is the application of security film for windows. This versatile product not only enhances safety but also significantly boosts energy efficiency. Let’s delve into how security films can transform your windows into powerful energy-saving assets.
Security film is a thin, multi-layered film applied to windows to enhance their strength and durability. Originally designed to prevent glass from shattering, these films now offer a range of additional benefits, including UV protection, thermal insulation, and increased privacy.
Dual Benefits: Security and Energy Efficiency
The primary purpose of security film is to hold broken glass together, reducing the risk of injury during break-ins or natural disasters. However, modern advancements have allowed these films to also play a significant role in improving a home’s energy efficiency. The films can reduce heat loss during colder months and minimize heat gain in the summer.
How Does Window Film Improve Energy Efficiency?
Energy efficiency window films work by reflecting solar energy and blocking ultraviolet light, which are major contributors to heat gain in homes. Here’s how they function to improve energy efficiency:
Thermal Insulation Properties
Thermal window films provide an additional layer of insulation to your windows. In colder months, they help retain heat by reducing thermal transfer, keeping your home warmer without over-reliance on heating systems. Conversely, during the summer, they reflect solar energy, ensuring your home stays cooler, thus reducing the need for air conditioning.
Reduction in UV Ray Penetration
UV rays can cause significant damage to your interiors, fading furniture, carpets, and artwork. By blocking up to 99% of these rays, window insulation film not only protects your home’s interior but also contributes to a cooler indoor environment.
Lower Energy Bills
By maintaining a more consistent indoor temperature, energy efficiency window films can significantly cut your heating and cooling costs. This not only results in lower energy bills but also reduces your carbon footprint, making your home more environmentally friendly.
Additional Benefits of Security Window Film
While energy efficiency is a significant advantage, security window films offer other benefits that can enhance your home’s comfort and security.
Enhanced Privacy
Security films can also increase the privacy of your home. Available in various tints and finishes, these films allow you to maintain natural light while obscuring the view from outside. This can be particularly beneficial for street-facing windows or homes in densely populated areas.
Increased Safety and Security
by Haberdoedas II (https://unsplash.com/@haberdoedas2)
In the event of an attempted break-in or an accident, security films hold shattered glass together, preventing injury and property damage. This added layer of protection can be a vital component of a comprehensive home security strategy.
Easy Maintenance and Durability
Once applied, security window films require minimal maintenance. They are scratch-resistant and can be easily cleaned with standard window cleaning solutions. Their durability ensures they continue to perform effectively for many years, offering lasting value for your investment.
How to Choose the Right Window Film for Your Home
Selecting the right window film involves considering factors such as climate, window orientation, and specific needs regarding privacy or security. Here’s a guide to help you choose:
Evaluate Your Needs
Determine whether your primary goal is to enhance security, improve energy efficiency, or both. Some films are designed to excel in specific areas, so understanding your priorities will help narrow down your options.
Consider the Climate
In regions with extreme temperatures, investing in high-performance thermal films can offer significant energy savings. For milder climates, a standard film may suffice.
Professional Installation
While DIY installation kits are available, professional installation ensures the film is applied correctly and performs optimally. Professionals have the expertise to handle different types of windows and can offer valuable advice on film selection.
Real-World Impact: Case Studies
Many homeowners have reaped the benefits of security films beyond their expectations. For instance, a family in Texas reported a 30% reduction in their summer cooling bills after installing energy-efficient window films. Similarly, a homeowner in Florida praised the additional security and privacy provided, alongside the cooler indoor temperatures during peak summer months.
Conclusion: The Smart Choice for Modern Homes
Security film for windows is an efficient, multi-functional solution for any homeowner looking to enhance their home’s energy efficiency, security, and aesthetics. By investing in high-quality window insulation films, you’ll not only enjoy a more comfortable living space but also contribute positively to the environment by reducing your energy consumption.
Whether you’re an interior designer seeking to offer clients eco-friendly solutions or a homeowner eager to modernize your living space, security window films present a compelling option. Consider consulting with a professional to explore how these films can be tailored to meet your specific needs and transform your home into a more secure, energy-efficient sanctuary.
Window films are thin layers applied to glass surfaces, designed to improve energy efficiency, reduce glare, and protect interiors from harmful UV rays. These films come in various types, each with unique properties that affect how much light they let through. Understanding these properties is essential for making an informed decision that benefits both your home and your plants.
The primary function of window films is to control the light and heat entering through glass surfaces. This control can lead to significant energy savings and improved comfort within your home. However, the key is to select the right type of film that aligns with your specific needs, particularly regarding the lighting conditions your plants require. Let’s explore the different types of window films available and how they interact with natural light.
Types of Window Films
Glare Reduction Film: This film type is specifically designed to minimize the harsh glare from sunlight, enhancing comfort in your living space without significantly reducing natural light. It is particularly beneficial for rooms with screens, such as home offices or living rooms with televisions, where glare can be a distraction. By diffusing intense sunlight, glare reduction films provide a balanced light environment, supporting both human and plant needs.
UV Protection Film: Known for its ability to block up to 99% of harmful UV rays, this film protects interiors from fading while allowing most of the visible light spectrum to pass through. This ensures that your plants receive adequate light for photosynthesis, making it an excellent choice for plant enthusiasts. UV protection films not only safeguard your furniture and artwork but also create a nurturing environment for your indoor garden.
Decorative Film: These films offer privacy and aesthetic appeal while allowing a moderate amount of light to enter. Available in various patterns and textures, decorative films can enhance the visual appeal of your home. They provide an opportunity to add a stylish touch to your interiors without compromising the light your plants need. By selecting the right design, you can achieve both privacy and a conducive environment for plant growth.
How Window Film Affects Plant Growth
Plants rely on the visible light spectrum for photosynthesis, the process that allows them to grow and thrive. Most window films are engineered to block UV rays without significantly affecting visible light. This means that, with the right film, your plants can still enjoy the sunlight they need. However, understanding the specific light requirements of your plants is essential in selecting the appropriate film.
It is important to choose a film that aligns with your plant’s light requirements. Some plants, like succulents and cacti, thrive in bright, direct sunlight, while others, like ferns and snake plants, do well in lower light conditions. Assessing the light needs of your plants is crucial when selecting a window film. By doing so, you can ensure that your plants continue to receive the optimal light conditions for healthy growth.
Balancing Light Needs and Home Improvement Goals
Achieving a balance between enhancing your home environment and maintaining healthy plants is possible with the right approach. With careful planning and consideration, you can enjoy the benefits of window film without sacrificing the well-being of your plants. Here are some strategies to consider:
Assess Your Plants’ Light Needs
Before installing window film, identify which plants require direct sunlight and which can tolerate indirect light. Grouping plants with similar light needs together near windows that receive the appropriate amount of sunlight can optimize their growth. This strategic placement ensures that each plant receives the right amount of light, promoting a thriving indoor garden.
Understanding the specific light requirements of your plants is key to creating an environment where they can flourish. By taking the time to assess these needs, you can make informed decisions about window film placement and selection, ensuring that both your home and your plants benefit from the film’s advantages.
Choose the Right Window Film
Select a window film that complements your interior design goals while still meeting your plants’ light needs. For instance, if glare reduction is a priority in your living room, but you have light-loving plants, opt for a glare reduction film that allows ample visible light. This ensures that your plants receive the necessary light for photosynthesis while you enjoy a more comfortable living environment.
The right window film can enhance the aesthetic appeal of your home while providing functional benefits. By carefully choosing a film that aligns with both your design preferences and your plants’ requirements, you can achieve a harmonious balance between style and plant health.
Consider Partial Film Application
If you have specific areas where plants need more light, consider applying window film only to portions of the window. This technique allows you to tailor the light exposure for different parts of the room, ensuring your plants receive the sunlight they require. Partial film application provides flexibility in managing light distribution and can be a practical solution for diverse plant needs.
By customizing the application of window film, you can create micro-environments within your home that cater to the unique needs of different plants. This approach allows you to enjoy the benefits of window film while ensuring that each plant receives the optimal light conditions for growth.
Installation and Maintenance Tips
When it comes to installing window film, precision and quality are key to ensuring optimal results. Proper installation and maintenance can enhance the performance and longevity of the film, contributing to a more comfortable and energy-efficient home environment. Here are some tips to help you get started:
Professional Installation
For best results, consider hiring a professional to install your window film. They can ensure a smooth application without bubbles or creases, which can affect the film’s performance and appearance. Professional installation guarantees that the film adheres properly to the glass surface, maximizing its benefits and ensuring a polished look.
A professional installer can also provide valuable insights into the best type of film for your specific needs and offer advice on placement and application techniques. Their expertise can help you achieve the desired outcomes while minimizing potential issues related to improper installation.
Regular Cleaning
Keep your window film clean to maintain its effectiveness. Use a soft cloth and a gentle cleaning solution to wipe away dust and smudges, ensuring that light can pass through unobstructed. Regular cleaning not only preserves the clarity and appearance of the film but also enhances its performance by allowing maximum light transmission.
By incorporating routine maintenance into your cleaning schedule, you can extend the lifespan of your window film and ensure that it continues to provide the desired benefits for both your home and your plants.
Monitor Plant Health
After installing window film, keep an eye on your plants’ health. If you notice any signs of light deficiency, such as wilting or stunted growth, consider repositioning your plants or adjusting the film application to improve light exposure. Monitoring plant health is essential in ensuring that your indoor garden thrives under the new lighting conditions.
By staying attentive to changes in plant health, you can make timely adjustments that enhance light conditions and promote healthy growth. This proactive approach helps maintain a vibrant and flourishing indoor garden, even with the addition of window film.
Real-World Examples and Testimonials
Many homeowners have successfully integrated window film into their living spaces without sacrificing plant health. These examples highlight the versatility and effectiveness of window film in creating a comfortable and nurturing home environment. Here are a few examples:
Case Study: A Sunroom Transformation
One homeowner transformed their sunroom into a comfortable, glare-free retreat by installing a UV protection film. Their collection of tropical plants continued to thrive, thanks to the film’s ability to block harmful UV rays while allowing plenty of visible light. This transformation not only enhanced the comfort of the sunroom but also created an ideal environment for the homeowner’s lush indoor garden.
The sunroom became a favorite spot for relaxation and enjoyment, with the window film playing a crucial role in maintaining the well-being of both the homeowner and their plants. This case study demonstrates the positive impact that the right window film can have on both home comfort and plant health.
Testimonial: A Bright and Stylish Kitchen
An interior designer used decorative window film in a client’s kitchen to enhance privacy and style. The client’s herb garden on the windowsill flourished, as the film allowed enough light for growth while providing the desired aesthetic. This successful integration of window film showcases how style and functionality can coexist, resulting in a beautiful and practical kitchen space.
The designer’s thoughtful choice of decorative film not only met the client’s design preferences but also supported the healthy growth of their indoor garden. This testimonial highlights the potential for window film to enhance both the appearance and functionality of a space, benefiting both homeowners and their plants.
Window film can be a valuable addition to your home, offering benefits like glare reduction, UV protection, and enhanced privacy. By choosing the right type of film and considering your plants’ light requirements, you can create a harmonious living environment that meets both your home improvement goals and your plants’ needs. The versatility of window film allows you to customize your space while ensuring that your indoor garden remains vibrant and healthy.
In conclusion, window film doesn’t have to interfere with the natural light your plants require. With careful selection and placement, you can enjoy the benefits of window film while keeping your indoor garden lush and thriving. By prioritizing the light needs of your plants and aligning them with your home improvement goals, you can achieve a balanced and inviting living space that caters to both human and plant occupants.